cropper
update

Nasty Performance ~ 847-458-4858 

update
  • Blog Home
  • Categories
    • Motorcycle Maintenance
    • Riding Tips & Preps
    • Safety & Inspection
    • Customizations & Upgrades
    • DIY Motorcycle Repairs
    • Motocycle Audio Systems
    • Motocycle Seasonal Care & Storage
    • Engine, Electrical Performance
  • Bike Night
  • Nasty Performance Motorcycle Shop
November 16.2025
1 Minute Read

Local Motorcycle Suspension Services: Boost Performance & Safety

Did you know that optimizing your motorcycle’s suspension can reduce accident risks by up to 37% ? If you demand the smoothest rides, better handling, and lasting bike performance, you can’t overlook local motorcycle suspension repair. This guide reveals how nearby pros can drastically improve your motorcycle’s safety and deliver tailored service, from routine maintenance to high-performance upgrades. Read on to discover how expert suspension care transforms your riding experience, extends component life, and protects your investment—right in your community.

Why Local Motorcycle Suspension Repair is Essential for Every Rider

"Did you know? A well-tuned motorcycle suspension can reduce the risk of accidents by up to 37%! Your safety and ride quality start with precision local motorcycle suspension repair."

dynamic sport motorcycle rider accelerating on a winding road, local motorcycle suspension repair in action, scenic mountainous background

When it comes to motorcycle safety and performance, few components are as pivotal as your local motorcycle suspension repair . Suspension systems—including fork tubes, shock absorbers, and innovative click suspension—are your bike’s first defense against road hazards, bumps, and sudden maneuvers. An expertly tuned suspension absorbs imperfections, delivers superior control, and maximizes comfort no matter your riding style.

Local repair shops offer tailored service that big-box online providers and DIY fixes simply cannot match. From diagnosing internal parts like fork tubes to ensuring that shocks are rebuilt with the highest quality parts, technicians use advanced diagnostic tools and race tech expertise to recommend solutions perfect for street, sport, or even mountain bike crossover enthusiasts. Scheduling regular suspension service with your nearby shop means issues like uneven tire wear, uncomfortable handling, or internal component damage won’t go unchecked—keeping your motorcycle suspension serviced for optimal performance and safety.

Understanding Local Motorcycle Suspension Repair: Components and Importance

  • What does local motorcycle suspension repair cover? – Every service includes detailed inspection and maintenance of fork tubes, shock absorbers, click suspension systems, and all internal suspension components.

  • Impact on performance, control, and safety – Professionally serviced suspension boosts ride quality, provides optimal control during aggressive maneuvers, and ensures every ride is safe—whether you’re commuting, racing, or exploring off-road trails.

  • When to schedule suspension service for your motorcycle – Plan for service every 12,000-15,000 miles or sooner if you notice symptoms like bouncing, poor cornering, or visible fluid leaks from fork and shock components.

What You'll Learn About Local Motorcycle Suspension Repair

  • Key signs you need a local motorcycle suspension service – Difficulty steering, noticeable vibration, uneven tire wear, and a harsh ride signal that your mountain bike or motorcycle may need professional attention.

  • Types of repair and upgrade options – From fork tube seal replacement to click suspension tuning and full race tech upgrades, local experts offer every suspension service your bike could need.

  • How local suspension experts customize solutions – Shops analyze your riding style—be it casual, sporty, or Santa Cruz trail riding—for a fully personalized suspension setup, ensuring it suits your favorite routes and performance goals.

Core Suspension Services: What’s Included in Local Motorcycle Suspension Repair?

  1. Inspection & Diagnosis: Detecting worn or damaged suspension components requires a keen eye and state-of-the-art tools. Every suspension service starts with an in-depth inspection, identifying fork tube leaks, shock absorber degradation, and clicking inconsistencies to protect your ride quality.

  2. Fork Tube Repair & Replacement: Fork tubes serve as the backbone of your front suspension. If bent, leaking, or suffering from degraded seals, professionals restore or replace them with highest quality parts, ensuring safety and reliable absorption.

  3. Shock Rebuilding and Tuning: Modern shocks include intricate internal components that require periodic service. Local suspension experts rebuild, re-valve, and optimize shock absorbers, whether for daily riders or race tech aficionados seeking peak performance.

  4. Click Suspension Adjustments: Race tech and Santa Cruz click suspension adjustments offer fine-tuned control catered to your bike and riding style. Shops fine-tune rebound, compression, and preload for a truly customized suspension set.

  5. Customization by Riding Style: Every rider is different. Whether you’re a commuter, sport enthusiast, or adventure rider, local motorcycle suspension repair customizes your setup using insights into your specific riding style and terrain.
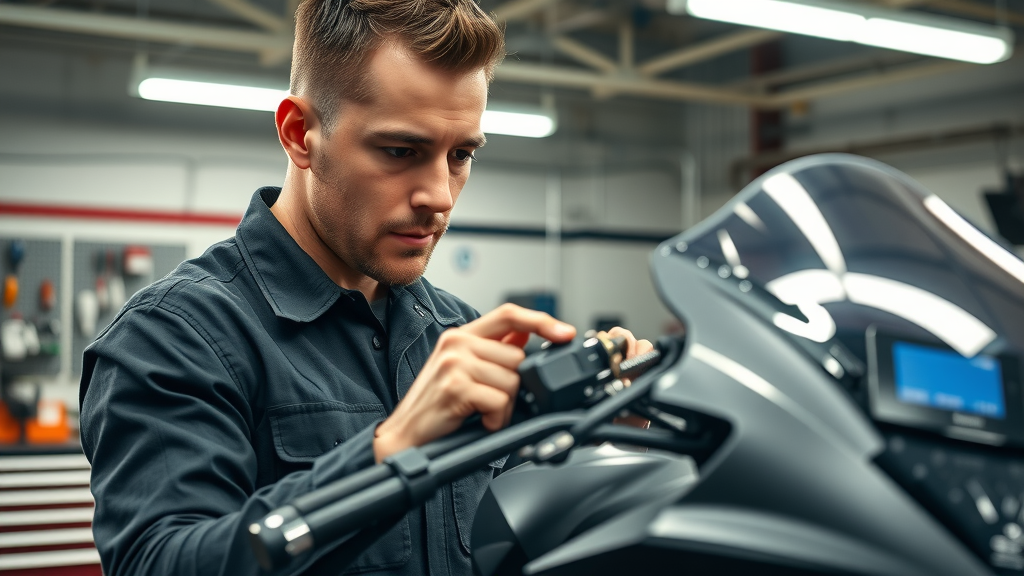
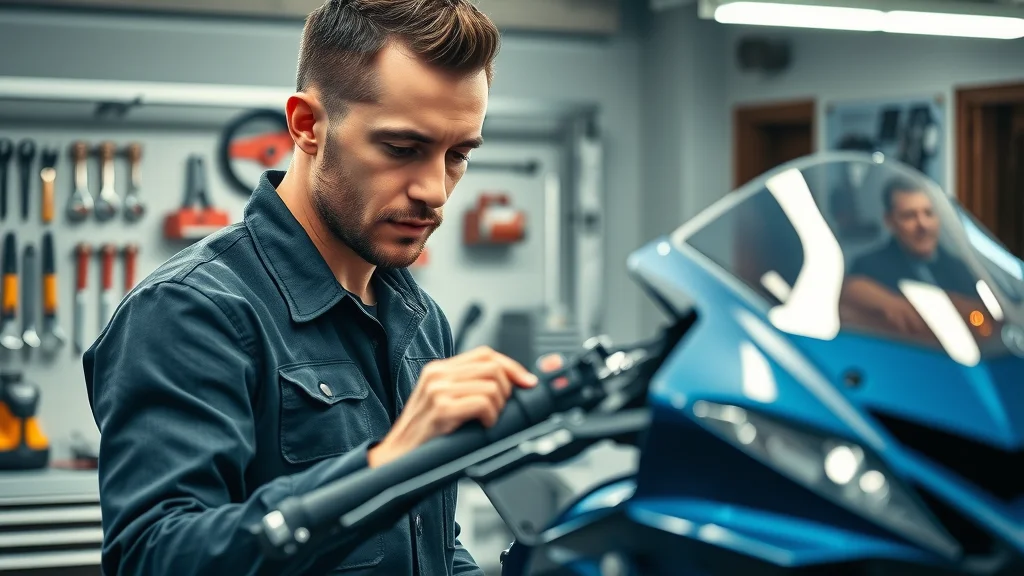
professional motorcycle mechanic adjusting suspension components, local motorcycle suspension repair

How Race Tech and Click Suspension Enhance Motorcycle Suspension Performance

Costs and Benefits of Motorcycle Suspension Services

Suspension Service

Average Cost

Expected Improvement

Fork Tube Repair

$120-$250

Smoother handling

Shock Revalve

$150-$300

Increased support

Click Suspension Tune

$80-$150

Precise control

Full Bike Suspension Service

$250-$600

Total ride performance

Race tech expertise and click suspension tuning bring advanced engineering to your motorcycle suspension. Local shops deploy these technologies to give you custom valving and adjustment options, maximizing both comfort and control for your chosen riding styles. Investing in full suspension service or specialized upgrades ensures you get the highest quality and longevity out of your fork and shock components, whether you’re tackling Santa Cruz trails or city streets.

These enhancements not only provide smoother handling and improved stability, but they also offer tangible safety benefits. High-level suspension services like those incorporating race tech and click suspension are developed for riders who expect the best, making your motorcycle exponentially more responsive over rough terrain and in fast corners. Choose shops with a proven track record in suspension tuning for optimal results.

Choosing a Trusted Local Motorcycle Suspension Repair Shop

  • Certifications: Look for Race tech and manufacturer-trained technicians—these credentials guarantee up-to-date skills in the latest suspension services.

  • Customer Reviews: Prioritize shops with a strong reputation and positive feedback regarding bike suspension service, ride quality, and results.

  • Equipment: Opt for repair centers with the latest diagnostic tools, ensuring efficient, accurate suspension setup and maintenance for brands from mountain bike to Santa Cruz.

  • Turnaround Time: A reliable local shop offers transparent estimates and fast, consistent service—so you’re never left stranded.
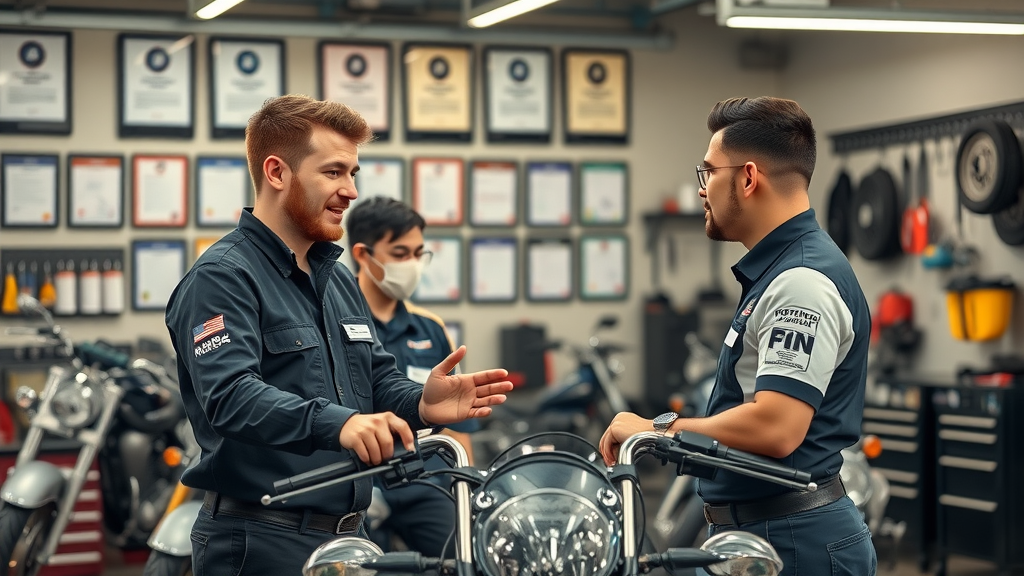
modern motorcycle repair workshop with certified staff, trusted local motorcycle suspension repair

The Benefits of Professional Local Motorcycle Suspension Service

  • Enhances ride comfort and safety: Regular suspension services absorb shocks, enable safer stops, and reduce rider fatigue for all riding styles.

  • Increases longevity of suspension components: Using highest quality parts and expert adjustment, local pros extend the life of shocks, fork tubes, and seals—saving you money over time.

  • Adapts the motorcycle to your unique riding style: Customization options such as click suspension and race tech upgrades mean your bike is set up for your preferred terrain, from street to Santa Cruz-inspired trails.

  • Maximizes bike performance: When your suspension is tuned for the way you ride, every mile on the road or trail feels smoother, safer, and more responsive.

"Suspension isn’t just about comfort—it’s a critical safety system that transforms how your motorcycle handles every corner and bump."

Pricing and Value: Local Motorcycle Suspension Repair Costs

How much does a suspension service cost?

  • Local motorcycle suspension repair prices typically range from $120 for basic fork tube service to over $600 for comprehensive suspension upgrades and customizations. Always confirm pricing and services with your chosen shop.

While some may be tempted by low-cost online offers or DIY solutions, working with certified local technicians ensures you receive the highest quality service. Local experts provide transparent quotes for everything from fork service and seal replacement to complex click suspension adjustments and full rebuilds, making it easier to plan your budget and select the best option for your riding style.

Always check for additional charges related to specialized race tech work or premium internal parts. Reputable shops stand behind their work with warranty coverage, delivering peace of mind every time you schedule your service.

Common Local Motorcycle Suspension Repair Problems and Solutions

How to fix stiff suspension on a motorcycle?

  • Adjust click suspension settings: Tuning rebound, compression, and preload can make your ride noticeably smoother for every terrain and riding style.

  • Replace or service worn fork tubes: Faulty fork tubes degrade handling and increase harshness; repair or replacement is often necessary.

  • Ensure proper lubrication and check for damaged components: Lubrication prevents wear, while inspecting for bent or cracked internal parts keeps your bike suspension serviced and safe to ride.

Tackling suspension stiffness can be a process of elimination. Certified local shops leverage advanced tools to test click suspension settings and diagnose issues with shocks or fork tube integrity. Professional repair ensures your suspension setup matches your riding style and surrounding areas, reducing fatigue and improving control.

Neglecting these issues can lead to further internal component damage or safety risks. Routine maintenance and seasonal suspension tuning are critical for optimal performance and peace of mind on any journey.

How do I know if my motorcycle suspension is bad?

  • Signs include excessive bouncing, uneven tire wear, reduced comfort, and poor cornering. Get an inspection from a local motorcycle suspension repair expert if in doubt.

Additional red flags include persistent fork tube leaks, increased difficulty in controlling your bike suspension, or noises coming from rear shock absorbers. Early intervention by a local repair expert can prevent more costly damage and reserve your right to the smooth, responsive ride your motorcycle is built to deliver.

A professional evaluation includes a comprehensive check of all bike suspension service components, from click suspension tuning to internal part wear, ensuring every element operates as designed.

How much does it cost to lower the suspension on a motorcycle?

  • Lowering a motorcycle suspension typically costs between $200 and $400, depending on model, method, and required parts.

The process often includes installing new fork tubes, adjusting spring tension, or swapping internal components, with costs varying based on bike make and the complexity of modifications. Local shops furnish detailed estimates and provide custom solutions so your mountain bike or motorcycle delivers proper stance and comfort.

Custom lowering improves accessibility but must always be performed by experienced professionals. Expert service guarantees ride quality and safety are never compromised throughout the process.

Comparing Motorcycle Suspension Service Options: Local vs. Online and DIY

Motorcycle Suspension Service Comparison

Service Type

Pros

Cons

Local Professional Shop

Expert results, warranty, safety

Higher up-front cost

Online Mail-In Service

Convenience, broad options

Delayed turnaround, shipping risk

DIY Repair

Lowest initial cost

High risk, less effective

While DIY and online options may appear cost-effective, only a qualified local motorcycle suspension repair shop delivers direct accountability, personalized adjustments, and safety-tested solutions. Shops specializing in bike suspension service are familiar with specific challenges posed by regional roads and climate—factors big online outlets often overlook.

Furthermore, local suspension services offer rapid response for urgent issues, in-person consultations, and often a satisfaction warranty—making them a clear choice for serious riders and commuters alike.

Top Tips for Maintaining Your Motorcycle Suspension After Local Repair

  • Inspect suspension components before every ride

  • Clean and lubricate fork tubes and shocks

  • Schedule seasonal click suspension adjustments

  • Follow your technician’s riding style recommendations

  • Keep a maintenance log for performance tracking
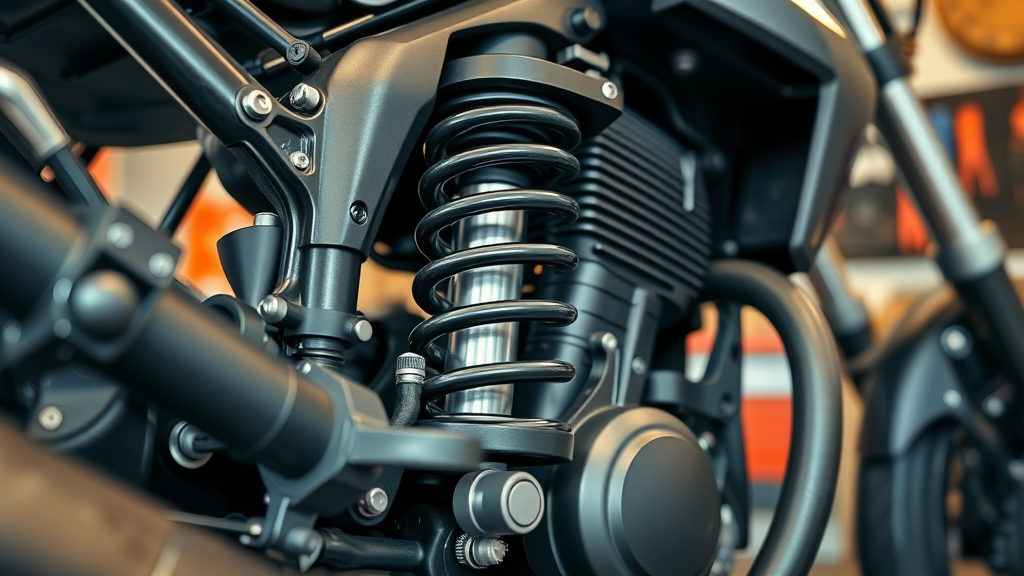
closeup view of pristine motorcycle suspension system with cleaned and lubricated components, bike suspension service

Following these expert tips ensures your fork tubes, shocks, and click suspension settings stay dialed in for the long term. Consistent upkeep translates to fewer unexpected breakdowns, extended suspension component life, and sustained ride quality matched to your riding style or environment.

Proactive maintenance includes checking for seal leaks, corrosion, and abnormal noises. Trusting your local pros with regular fork service and suspension tuning also means you’ll catch any issues early, avoiding costly repairs or replacement down the road.

Frequently Asked Questions About Local Motorcycle Suspension Repair

  • How often should I have a suspension service?
    Most riders benefit from a professional bike suspension service every 12,000-15,000 miles. However, aggressive or off-road riding styles, or participation in events like mountain bike races, may require more frequent service.

  • Is race tech tuning worth the cost for casual riders?
    Race tech tuning provides precision control and custom valving for demanding riders, but even casual riders can experience increased comfort, improved ride quality, and superior suspension setup when investing in these upgrades.

  • Can local shops handle custom Santa Cruz or click suspension systems?
    Absolutely. Top-rated local motorcycle suspension repair centers regularly work with Santa Cruz and click suspension systems, offering both maintenance and full custom tuning tailored for every riding style and bike brand.

  • What is the warranty on a typical bike suspension service?
    Reputable shops often offer warranties from 30 days to one year, covering workmanship and select internal parts. Be sure to ask about warranty coverage when you schedule your service.

Upgrade Your Ride with Local Motorcycle Suspension Repair – Book Your Service Today!

  • Consult with our experienced technicians at Nasty Performance Motorcycle Shop for all motorcycle, bike, and click suspension needs.

  • Get personalized advice for your riding style, from routine suspension services to race tech upgrades.

  • Call Nasty Performance Motorcycle Shop Today: 847-458-4858

Key Takeaways from Choosing a Local Motorcycle Suspension Repair Expert

  • Local motorcycle suspension repair keeps you safer and makes every ride smoother.

  • Expert service pays off in performance, longevity, and customization.

  • Trust a reputable local shop with certified technicians and modern suspension services.

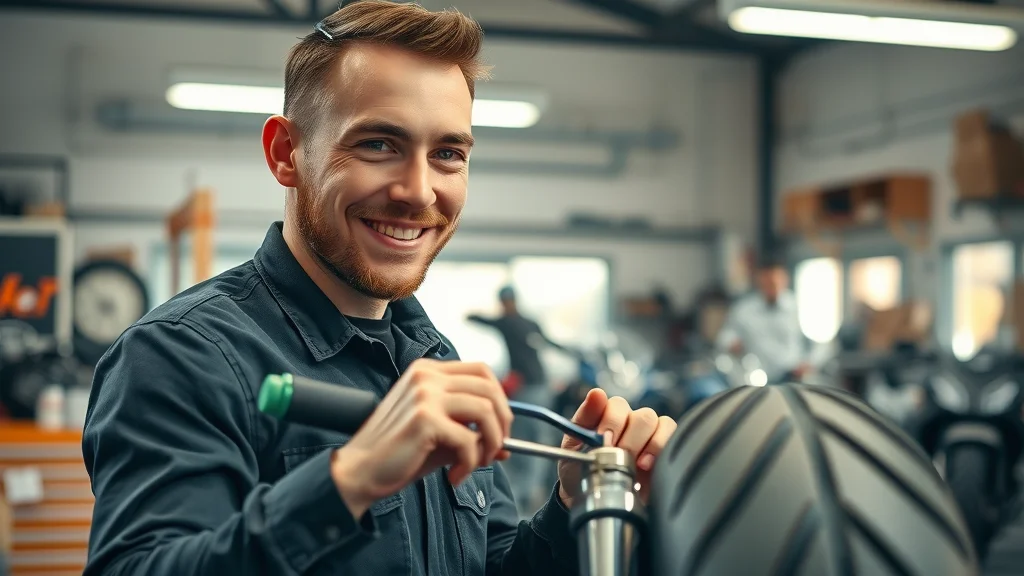
happy motorcycle owner shaking hands with suspension technician outside a trusted local motorcycle suspension repair shop

See Local Motorcycle Suspension Repair in Action

Watch How Local Motorcycle Suspension Repair Transforms Ride Quality

split scene of motorcycle ride before and after local motorcycle suspension repair, left shows bumpy ride, right shows smooth ride

Regular maintenance of your motorcycle’s suspension system is crucial for ensuring optimal performance, safety, and comfort. A well-maintained suspension absorbs road irregularities, providing a smoother ride and better handling. Neglecting this essential component can lead to decreased traction, uneven tire wear, and increased risk of accidents.

For a comprehensive understanding of the importance of suspension servicing, consider reading The Importance Of Servicing Motorcycle Suspension . This article delves into how regular maintenance can prevent issues like oil contamination and damaged seals, which are common culprits behind suspension failures.

Additionally, Keeping your motorcycle suspension in good shape offers practical tips on regular inspection, proper maintenance, and the benefits of professional servicing to ensure your suspension remains in top condition.

If you’re serious about enhancing your motorcycle’s performance and safety, these resources will provide valuable insights into the significance of suspension maintenance and how to effectively care for this vital system.
Motorcycle Maintenance

0 Comments

Write A Comment

*
*
Please complete the captcha to submit your comment.
Related Posts All Posts

Step-By-Step Motorcycle Brake Pad Replacement

Ever wondered if your brakes would protect you in a split second— or could worn pads put your ride and safety at risk? This in-depth guide on motorcycle brake pad replacement takes out the guesswork, helping riders of all experience levels understand, diagnose, and tackle brake pad issues before they compromise safety. We’ll cover every critical step, from signs of wear to pro tips on installing new pads, so your motorcycle brake system performs at its best every time you hit the road. Why Motorcycle Brake Pad Replacement Is Critical for Rider Safety Neglecting to replace worn brake pads can compromise your motorcycle’s most vital safety feature: reliable stopping power. Motorcycle brake pad replacement is not just a routine maintenance task; it’s a lifesaver that ensures your brake system operates effectively whenever you squeeze that brake lever. Old or degraded brake pads reduce friction material, causing increased stopping distances and a less progressive feel, which can be a critical risk in emergencies. Regular pad replacement keeps your braking predictable, especially in sudden or hazardous conditions. Modern motorcycles rely on a precise combination of brake caliper, pads, and rotors, all working in harmony to deliver strong and controllable deceleration. If your brake pads are thin or contaminated, the caliper piston must travel further and harder to press the pad against the disc, potentially overheating components and damaging the rotor. Worn-out pads could cause metal-to-metal contact, destroying rotor surfaces and leading to costly repairs. For both new and seasoned riders, keeping up with brake pad replacements can make the difference between a close call and a crash. “Your motorcycle brake pads are the front line of your safety—learn the signs before you ride.” – Industry Expert The Role of Motorcycle Brake Pads in Safe Riding At the core of every dependable motorcycle brake job lies the humble brake pad. Each pad consists of a friction material bonded onto a metal backing plate, designed to press against your brake disc when the brake lever or pedal is applied. This friction is what allows your motorcycle brake system to slow or stop the bike safely and smoothly. Pads suited to your riding conditions—whether organic pads for daily commutes or sintered pads for high-performance needs—determine not only your stopping distance, but also the progressive feel and control of your brakes. Functioning as the critical interface in your brake caliper, the brake pads must absorb heat and dissipate energy efficiently. Over time, the friction material wears down, reducing effectiveness, especially as contaminants from the road or worn hardware decrease performance. For every type of motorcycle brake system, keeping a sharp eye on pad thickness and wear not only saves money down the road but makes each ride safer, ensuring your ability to stop when it matters most. Warning Signs: When to Consider Motorcycle Brake Pad Replacement Knowing the warning signs of worn pads can prevent damage to your motorcycle brake caliper and rotor. If you hear a squealing, screeching, or grinding noise during braking, it’s likely the brake pad friction material is low and the wear indicator is contacting the rotor. A reduced brake lever response, increased stopping distances, or a spongy feel to the lever or pedal signal that your pads could be too thin to perform effectively. Visual inspection is just as important—look for grooves, cracks, or discoloration on the pads and surface of the rotor. If you see uneven pad wear or oil and debris embedded within the friction material, it’s time for an immediate pad replacement. Ignoring these symptoms could lead to a more expensive brake job or dangerous loss of stopping power while riding. What You'll Learn About Motorcycle Brake Pad Replacement Fundamentals of how brake pads work in your motorcycle brake system Necessary tools and preferred safety gear for handling brake pads A comprehensive motorcycle brake pad replacement process Inspection tips to prolong your motorcycle brake pads’ lifespan Common mistakes to avoid during motorcycle brake pad replacement Essential Tools and Safety Gear for Motorcycle Brake Pad Replacement Basic toolkit: wrenches, screwdrivers, pliers Jack or motorcycle lift for stable access Protective gloves and eyewear Brake cleaner and lint-free cloths for brake pad handling Tools/Supplies Function Wrenches Removing caliper bolts Brake Cleaner Decontaminating rotor and pads Gloves, Eye Protection Safety during brake pad replacement Step-By-Step Motorcycle Brake Pad Replacement Process 1. Preparing to Replace Your Motorcycle Brake Pads Preparation is an essential step before starting any motorcycle brake pad replacement job. Park your motorcycle on a stable, level surface and use a jack or motorcycle lift to secure it upright. Gather your basic toolkit — including the necessary wrenches or sockets for your specific bike, screwdrivers, pliers, and a can of brake cleaner. Don’t forget to wear protective gloves and safety eyewear to prevent injuries from debris, brake fluid, or metallic dust. Place lint-free cloths nearby for cleaning the caliper, rotor, and your hands as you work. Before removing any parts, consult your motorcycle’s manual for instructions specific to your make and model. Identify the brake caliper and confirm the correct pad type: sintered pads, semi-sintered, or organic pads may differ in installation. Taking site photos of the assembly beforehand (just like a photo by Ari Henning or other mechanic pros) can help you reassemble everything correctly later. Efficient preparation is the backbone of a safe, successful brake pad replacement. 2. Removing Old Brake Pads Safely After setting up, locate your brake caliper and remove the caliper bolts with the appropriate wrench. Support the caliper so it doesn’t stress the brake line (never let it dangle from the hose). Carefully extract the retaining pin or spring plate—pay attention to the order and orientation, as this retaining hardware must go back exactly as found to ensure proper performance. Once pins are clear, slide the old brake pads out, noting their position relative to the caliper piston and retaining bracket. It’s crucial not to damage the caliper piston or seals in this process. If your bike has a master cylinder with a reservoir cap, open the cap slightly to relieve pressure but avoid introducing debris. As you remove the worn pads, look for uneven wear, embedded grit, or loss of friction material. Using a brake cleaner and a cloth, wipe the inside of the caliper and ensure all areas are free of dust and contamination. Removing old pads methodically prevents damage to the caliper pistons and makes fitting the new pads more straightforward. 3. Inspecting Your Motorcycle Brake and Brake Pads With the old brake pads out, take time to closely examine the friction material, wear indicators, and any defects. Compare the used pads with new replacements, looking for thinning, cracking, or heat discoloration—these are signs the pads have exceeded their lifespan and may have compromised the rotor’s surface. Inspect the caliper piston for smooth extension and retracting movement; consider carefully cleaning the caliper to remove built-up grime. Assess the brake disc or rotor for grooves, scoring, or blue spots that suggest overheating. Check the retaining hardware and ensure all parts, like threaded pins or spring plates, are undamaged. Confirm that fluid level in the master cylinder is adequate but never overfilled; this is especially important when compressing caliper pistons to create space for thicker, new pads. An attentive inspection not only prolongs the life of your new pads but also enhances your motorcycle brake system’s reliability. 4. Installing New Motorcycle Brake Pads Correctly Before fitting new brake pads, double-check for cleanliness—any grease or dirt on pad surfaces can impair friction or lead to noise. Compress the caliper piston gently using a pad spreader, C-clamp, or the old pad and a large flat screwdriver. Align new pads as per your earlier site photo or manual, ensuring the friction material faces the rotor and that all shims or spring plates are in place. Slide new pads into the caliper, reinstall the retaining pin or threaded pin, and torque all bolts to manufacturer specifications. Reattach the caliper to the mounting bracket, again using factory torque settings—improper installation could reduce braking performance and create a serious hazard. Confirm that the brake lever moves freely and returns smoothly after each squeeze. This care guarantees your fresh pads settle in correctly, maximizing stopping power. As you work through the brake pad replacement process, it's also important to consider how seasonal changes can impact your motorcycle's braking performance and overall maintenance needs. For practical advice on adapting your care routine throughout the year, check out these seasonal bike care secrets every rider must know to keep your ride in top condition no matter the weather. 5. Testing Your Brake Pads After Installation After brake pad replacement, it’s essential to bed in your new pads to achieve optimal braking performance and avoid brake fade. Reinstall the wheel if removed, and before your first ride, pump the brake lever several times to bring the pads into contact with the rotor, checking for proper resistance. Roll the bike forward and engage the brakes gently to ensure the caliper engages smoothly. On your test ride, follow the 30 30 30 rule: accelerate to 30 mph, apply the brakes moderately 30 times, allowing at least 30 seconds between stops for cooling. This process helps embed the new friction material onto the rotor for consistent, progressive feel. Monitor the system for any noise, sponginess, or vibration. Address issues immediately, as overlooked installation errors can lead to brake job failure or pad and rotor damage. Motorcycle Brake Pads Maintenance Tips and Longevity How frequent checks maximize your brake pad lifespan Tips for preventing premature motorcycle brake pad wear Best practices for cleaning and maintaining your brake pads Frequent inspections—at least every 5,000 miles or before long trips—are crucial for maximizing the durability of your motorcycle brake pads. Check pad thickness and the surface for embedded debris. Cleaning the caliper and rotor during each brake job or tire change keeps your brake system free of contaminants that can shorten pad life. Avoid harsh braking whenever possible, as aggressive use generates heat and can speed up wear. Select pads best suited for your riding style and environment: organic pads offer quieter braking and smoother feel in urban settings, while sintered pads or semi sintered pads excel in high-load or sport scenarios. Always handle pads with clean gloves to prevent oils from contacting the friction material. Maintain proper fluid levels, check retaining hardware for corrosion, and ensure the caliper piston operates freely for longer brake component life. People Also Ask: Your Motorcycle Brake Pad Replacement Questions How often should I change motorcycle brake pads? Motorcycle brake pad lifespans vary—inspect every 5,000 to 10,000 miles or as your motorcycle brake manufacturer recommends. What is the 30 30 30 rule for brakes? This refers to gently applying your new brake pads at 30 mph, for 30 times, letting them cool for 30 seconds between each use to bed them properly. Are motorcycle brake pads easy to change? With proper tools and guidance, motorcycle brake pad replacement is manageable for most riders with basic mechanical skills. Does O'Reilly's carry motorcycle brake pads? Some O'Reilly Auto Parts locations may stock motorcycle brake pads, but check specific store availability or consult a motorcycle-specific retailer. Common Mistakes to Avoid During Motorcycle Brake Pad Replacement Neglecting to properly torque caliper bolts after working with brake pads Touching the surface of new brake pads with greasy hands Failing to inspect rotors and caliper condition along with motorcycle brake pads Mistake Impact Improper installation Reduced braking performance Ignoring pad wear indicators Potential safety hazard Skipping rotor inspection May damage new brake pads Key Takeaways for Motorcycle Brake Pad Replacement Routine motorcycle brake pad checks safeguard your safety Correct motorcycle brake pad replacement ensures peak performance Always follow manufacturer guidelines during any brake pad replacement FAQs: Further Insights on Motorcycle Brake Pad Replacement How do I know if my motorcycle brake pads need replacing? Check your brake pads for thinning friction material, squealing noises, or longer stopping distances. If the pad thickness is less than 2–3 mm or you notice uneven wear, it's time for a replacement. What are the signs of worn motorcycle brake pads? Common signs include squeaking or grinding noises while braking, a spongy or unresponsive brake lever, vibration during braking, or visible metal on the pad surface. Any of these signals mean immediate attention is required to maintain safe braking performance. Can worn brake pads damage other motorcycle brake components? Yes, riding with worn pads can lead to metal-on-metal contact, damaging the rotor and potentially the brake caliper piston. This can result in much higher repair costs and safety risks. Should I replace front and rear motorcycle brake pads at the same time? Not always—check each set independently. Pads may wear differently based on riding style and braking habits. Replace them as needed, but always inspect both front and rear during maintenance. Contact the Experts for Motorcycle Brake Pad Replacement Call Nasty Performance Motorcycle Shop Today: 847-458-4858 Don’t leave your safety to chance—get your motorcycle brake pads checked or replaced by trusted professionals. Ride safe! Mastering brake pad replacement is a vital skill for every rider, but true motorcycle care goes beyond just the brakes. If you’re ready to elevate your maintenance routine and protect your investment year-round, discover how proactive seasonal care can make a difference. Explore essential seasonal bike care strategies that help you anticipate issues before they arise, extend the life of your components, and ensure your motorcycle is always ready for the next adventure. Take the next step in your maintenance journey and unlock the secrets to confident, all-season riding.

Expert Tips for Motorcycle Coolant Flushing

Did you know that one in three motorcycles suffering from engine overheating could have prevented the issue with regular motorcycle coolant flushing? Many riders overlook this simple maintenance task, yet it can be the difference between effortless rides and unexpected roadside breakdowns. In this comprehensive guide, you’ll uncover why proper coolant system care is crucial, learn to spot the signs your cooling system needs attention, and get step-by-step instructions to safely flush your motorcycle coolant—ensuring reliability for every journey. Why Motorcycle Coolant Flushing Is Crucial for Your Cooling System “Neglecting regular motorcycle coolant flushing can lead to overheating, costly repairs, and system failure—protect your cooling system with scheduled maintenance.” – Motorcycle Maintenance Expert Keeping your motorcycle’s cooling system in prime condition should be a top priority for every rider. Regular motorcycle coolant flushing is critical because it removes old, contaminated coolant—and with it, any scale, corrosive deposits, or debris—helping prevent water pump and gasket failures. When motorcycle coolant isn't flushed out on time, the resulting buildup can reduce the efficiency of your radiator fan and impairs the boiling point stability, which raises the risk of engine overheating. The coolant system is much more than a simple collection of hoses and fluids; it’s a lifeline that regulates temperature, preserves essential engine components, and keeps everything running at peak performance. Ignoring scheduled coolant changes places unnecessary strain on your reservoir tank and water pump. Flushing your coolant system at recommended intervals minimizes risks and ensures your bike’s performance stays uncompromised, so you can enjoy a smooth, worry-free experience every ride. Extend engine lifespan Prevent overheating in your cooling system Maintain peak engine performance Remove harmful deposits from the coolant system What You'll Learn in This Motorcycle Coolant Flushing Guide This article leaves no stone unturned for your motorcycle coolant flushing needs. Every rider, from DIY beginners to seasoned cruisers, will find actionable insights and real-world tips to keep your cooling system and coolant system running at their best. Each section dives deep, offering not just procedures but best practices honed by professionals, including how to select the ideal coolant types and avoid mistakes that could cost you in the long run. How motorcycle coolant flushing keeps your cooling system running efficiently Best practices for selecting and using distilled water and fresh coolant Step-by-step guide to flush the system Common mistakes to avoid during motorcycle coolant flushing Insights on coolant types suitable for motorcycles As you focus on maintaining your motorcycle’s cooling system, it’s equally important to consider how seasonal changes can impact your bike’s overall health. For a deeper dive into preparing your motorcycle for different weather conditions and ensuring year-round reliability, explore these seasonal bike care strategies every rider should know. Understanding the Motorcycle Coolant System How the Motorcycle Cooling System Works The heart of your motorcycle’s engine health lies in the coolant system. This system is made up of several main components: the radiator, water pump, hoses, reservoir tank, thermostat, and radiator cap. The radiator absorbs and dissipates heat, while the water pump circulates coolant throughout the engine, drawing excess warmth away from critical moving parts. When running, the temperature gauge monitors heat levels, and the radiator fan kicks in if the heat rises too high—even on hot days in traffic. Coolant is a special liquid blend—often a mixture of distilled water, ethylene glycol, or propylene glycol—that prevents freezing and boiling in the cooling system, maintaining the engine cool at all times. The filler neck is the access point for adding coolant, but it’s essential that only the recommended ratio of water and coolant is used. Regular flushing is necessary because, over time, even the best fluids break down and accumulate grime, lowering their effectiveness and putting your engine at risk of overheating or even major mechanical failure. Main components of the cooling system Role of coolant in temperature regulation Why flushing the system is necessary Common Problems Prevented by Motorcycle Coolant Flushing Routine motorcycle coolant flushing combats several common issues that can develop as your bike racks up miles. The most significant are corrosion and scale buildup. Contaminants in the old coolant slowly erode metal parts—particularly around the water pump, radiator core, and gasket seals. This corrosion can create leaks or blockages, hindering the coolant’s flow and causing the engine’s temperature to spike. Failure to properly flush the system can also result in destructive buildup around the drain bolt and cause water pump or gasket failures. Small leaks or improper coolant type can lead to chronic overheating, forcing the engine to work harder to remain cool. Persistent issues here might even demand expensive repairs or replacement parts. By adopting a scheduled coolant maintenance routine, you’ll minimize the risk of dramatic mechanical breakdowns and preserve the life and performance of your ride. Corrosion and scale buildup Water pump and gasket failures Coolant leaks and overheating Coolant Types Explained for Motorcycle Coolant Flushing Before you flush your system or reach for a bottle of fresh coolant, it’s vital to understand the range of coolant types available and which is right for your bike. Traditional coolants typically contain ethylene glycol and require regular replacement, while long-life modern coolants may be based on advanced formulas that protect against corrosion and maintain the correct boiling point. Premixed coolants are formulated with distilled water, making them ready to use out of the bottle, whereas concentrates must be diluted before use. If you’re ever unsure whether to use water vs. premixed coolant, check your owner’s manual or consult with a mechanic. As a golden rule, never use tap water—it contains minerals that can cause scale deposits and degrade your radiator core. Distilled water, on the other hand, ensures cleanliness and compatibility. Always match your motorcycle’s requirements for coolant types, as using the wrong formula can lead to premature component wear or system blockage, endangering your cooling system. Differences between traditional and long-life coolants When to use water vs. premixed fresh coolant Choosing the right coolant type for your model Comparison of Popular Motorcycle Coolant Types Coolant Type Features Pros Cons Compatibility Traditional Ethylene Glycol Basic protection, requires mixing with distilled water Cost-effective; widely available Shorter lifespan; toxic Most older and some modern bikes Long-Life Coolant (OAT/HOAT) Advanced corrosion inhibitors; pre-mixed or concentrate Extended interval; less frequent changes Higher cost; potential incompatibility Most modern motorcycles Propylene Glycol Based Low toxicity, environmentally friendly Safer for pets & kids; good performance Higher price; not always OEM-approved Check compatibility with your model Essential Tools and Supplies for Flushing the System Before you embark on your coolant system maintenance, gathering the right tools and supplies is crucial for a smooth, effective flush. Start with distilled water, the backbone for rinsing out contaminants from your bike’s cooling system. Never substitute tap water, as it introduces minerals that can scale up your system or reduce efficiency. Your choice of fresh coolant is equally important; opt for a type that matches your bike’s requirements for chemical protection and boiling point control. It pays to research whether your engine is better suited for ethylene glycol, propylene glycol, or a proprietary blend recommended by your motorcycle’s manufacturer. Having the right gear also means using clean funnels for pouring coolant and distilled water, a sturdy drain pan to catch old fluid, protective gloves, and safety glasses. Make sure you have access to the drain bolt or drain plug, and check that your garage floor is prepared to deal with any spills. Organizing your supplies keeps the job straightforward and minimizes the risk of missing a vital step or contaminating your coolant system during maintenance. Distilled water for rinsing Fresh coolant for refill Funnels, pans, and safety protection Step-by-Step Motorcycle Coolant Flushing Process Proper motorcycle coolant flushing involves a series of carefully executed steps to ensure your cooling system is spotless, free from harmful deposits, and ready for a fill of fresh coolant. Before starting, take your time to prepare, as safety and thoroughness are key. Preparation: Ensuring Safety and Readiness Let the engine cool completely before opening any part of the coolant system—the pressurized hot coolant can cause serious burns if released too soon. Park your bike on a level surface and make sure the ignition is off. Gather all your necessary tools: distilled water, the right fresh coolant for your motorcycle, funnels, a drain pan, and sturdy gloves. Keep a rag handy for small spills and a bin for used fluids. Double-check that all parts, including the drain bolt and filler neck, are easily accessible and the area is clean and free of clutter. This preparation paves the way for a safe, efficient flush of your cooling system. Let the cooling system cool down Gather the necessary tools and distilled water Draining the Old Fluid from the Coolant System First, access the drain bolt or drain plug, usually located at the lowest point on your cooling system—often on the water pump or near the bottom of the radiator. Place your drain pan directly underneath to catch the old coolant as it flows out. Remove the radiator cap to relieve any residual pressure and allow air in for a more complete drain. Carefully unscrew the drain bolt and let the old coolant run into the pan. Avoid skin contact and keep the fluid away from pets and children, as it’s toxic. Once draining is complete, inspect the radiator cap and the inside of the reservoir tank for residue or corrosion; these are early signs your coolant system needs close attention during the flush. Locating the drain bolt Safely disposing of used coolant How to Flush the System Using Distilled Water After draining, reinstall the drain bolt and pour distilled water into the radiator or reservoir tank up to the fill line. Replace the radiator cap and start the engine, letting it idle for several minutes so the water circulates, solubilizing any lingering contaminants. Turn the engine off, let it cool, and drain the distilled water from the system again. Repeat this process until the liquid draining out is clear—usually two or three flushes does the trick. This step ensures no old coolant, mineral buildup, or air bubbles remain, setting the stage for your new coolant to provide maximum protection. Pouring distilled water through the coolant system Flushing until the water runs clear Refilling with Fresh Coolant and Bleeding the System With the system fully flushed and the drain bolt back in place, slowly pour the recommended fresh coolant (matching type and concentration for your motorcycle model) into the filler neck until the coolant level reaches the fill line. Reinstall the radiator cap securely. Next, start the engine and let it idle to circulate the fresh coolant, periodically squeezing coolant hoses to help dislodge any remaining air bubbles trapped in the cooling system. To properly bleed the system, you may need to loosen the bleeder bolt or run the engine with the radiator cap off (if your manual allows; always check). Once the coolant system stops bubbling and the level stabilizes, top up as needed. This critical bleeding step prevents overheating and maintains the right boiling point for your engine. Selecting the right fresh coolant Bleeding air pockets from the cooling system For those who want a visual overview, check out our step-by-step walkthrough covering draining, flushing, refilling, and bleeding the system. This demonstration highlights each stage with close-ups on hands, tools, and key components in a neutral garage setting. Post-Flushing Checklist for Your Cooling System After completing the flush, it’s essential to double-check your work to ensure the cooling system is leak-free and operating efficiently. Start by visually inspecting all hoses, the radiator cap, and connection points for leaks. Next, check the coolant level in the reservoir tank and add more coolant if it dips after a test ride. Run the engine and monitor the temperature gauge to ensure it stays within the safe range and that the radiator fan kicks in as needed. Keeping the system balanced helps prevent overheating and guarantees long-term engine protection. Checking for leaks in the coolant system Proper coolant level balance Verifying engine temperature stability Mistakes to Avoid During Motorcycle Coolant Flushing Even experienced riders can slip up during a coolant system flush. A major error is using tap water, which deposits minerals that degrade your radiator core and water pump over time—always opt for distilled water. Skipping the bleed step can leave dangerous air bubbles in your cooling system, disrupting heat transfer and inviting overheating. Another common pitfall is mixing incompatible coolant types; blending propylene glycol and ethylene glycol formulas can trigger chemical reactions that damage seals and passages in the coolant system. Take the time to research your model’s requirements, gather the right supplies, and follow each step without shortcuts to guarantee you get the longest possible life from your engine. Using tap water instead of distilled water Skipping system bleed steps Mixing incompatible coolant types How Often Should You Perform Motorcycle Coolant Flushing? “Regular coolant flushing, recommended every two years or as per your owner’s manual, prevents breakdowns and maximizes your engine’s reliability.” – Certified Motorcycle Mechanic The ideal interval for motorcycle coolant flushing depends on your bike’s make, model, riding conditions, and manufacturer recommendations. For most motorcycles, experts suggest flushing the coolant every two years or after a set mileage—whichever comes first. Hard-use conditions, like frequent stop-and-go traffic, cold climates, or high-performance riding, may require more frequent attention. Look for signs like a rising temperature gauge, visible sediment in the coolant, or reduced radiator fan effectiveness as clues that your system needs service sooner. Checking your owner’s manual is vital, as some modern coolants are formulated for even longer service lives. Always keep track of your maintenance schedule to ensure maximum reliability. Factors affecting coolant change frequency Signs your motorcycle is due for flushing People Also Ask About Motorcycle Coolant Flushing Do you need to flush the coolant on a motorcycle? Flushing the coolant system is necessary to remove contaminants and retain performance; neglect can lead to overheating and damage. Regular cleaning ensures the radiator cap, water pump, and filler neck are free of buildup, helping prevent costlier future repairs. How much does a motorcycle coolant flush cost? The cost varies depending on whether you do it yourself or use a shop and on your bike’s make and model; call for a precise quote. DIY flushes require basic supplies (distilled water and fresh coolant), while a full professional service often includes additional checks on the coolant system and cooling system integrity. How do I flush motorcycle coolant? Draining old coolant, flushing with distilled water, and refilling with fresh coolant are essential—refer to our detailed step-by-step process above. Make sure to bleed air bubbles thoroughly and always dispose of used fluids responsibly to protect your bike and the environment. How often should you change the coolant in a motorcycle? Most manufacturers advise a coolant flush every two years, but consult your manual or mechanic for specific intervals. Factors like riding environment, coolant types, and model recommendations may impact how often to service your system. Still facing issues after a flush? Our troubleshooting video covers diagnosing persistent problems like coolant leaks, air bubble formation, or radiator fan failure after maintenance, ensuring you spot and solve any cooling system troubles fast. FAQs About Motorcycle Coolant Flushing Which coolant types are safe for my bike? Always check the owner’s manual for approved coolant types, and only use those recommended for your engine materials and climate. Can I reuse coolant after flushing the system? No, always replace old coolant with fresh coolant. Used fluids lose their effectiveness and may contain debris that harms the cooling system. What if my cooling system still overheats after flushing? Check for leaks, thermostat issues, or trapped air bubbles. Persistent overheating requires a professional diagnosis—do not ignore the warning signs. Is flushing DIY or shop-only? With the right instructions and tools, many riders can complete motorcycle coolant flushing at home. However, major issues or uncertainty may require a visit to the shop for safety. Key Takeaways for Proper Motorcycle Coolant Flushing Never skip regular motorcycle coolant flushing Always use distilled water and fresh coolant Understanding your coolant system and cooling system ensures longevity Seek expert help if unsure about coolant types or procedures Ready for Your Next Motorcycle Coolant Flushing? “A well-maintained cooling system is the heart of your motorcycle’s reliability—make coolant flushing a regular habit.” Call Nasty Performance Motorcycle Shop Today: 847-458-4858 Conclusion: Don’t let your next ride be interrupted by a minor oversight. Stay proactive with regular motorcycle coolant flushing, follow our expert-backed checklist, and enjoy peace of mind on every journey! Maintaining your motorcycle’s cooling system is just one piece of the puzzle when it comes to long-term bike health and performance. If you’re ready to take your maintenance routine to the next level, discover how a holistic approach to seasonal care can protect your ride from the elements and keep it running smoothly all year long. Uncover expert advice and practical tips in our comprehensive guide to seasonal bike care secrets every rider must know. By integrating these strategies with your regular coolant flushing, you’ll ensure your motorcycle is always ready for the road—no matter what the season brings.

Tips on Performing Preventive Motorcycle Maintenance

Did you know? According to industry experts, over 70% of unexpected motorcycle breakdowns result from neglecting simple preventive maintenance tasks. Staying ahead with scheduled checks not only boosts your safety, but ensures every ride of the season is both reliable and exhilarating. This guide unpacks every critical step, tip, and pro secret for mastering preventive motorcycle maintenance and keeping your bike in peak condition for the long haul. Why Preventive Motorcycle Maintenance Matters: The Road to Reliability If you’ve ever felt the anxiety of being stranded by the side of the road or faced a last-minute cancellation due to mechanical trouble, you already understand the value of regular, preventive motorcycle maintenance. Routine tasks like checking tire pressure, monitoring the engine oil, and performing brake inspections are crucial to detect issues early before they escalate into costly repairs or compromise your safety. Preventive maintenance goes far beyond simple fixes; it establishes a consistent maintenance routine that helps you easily identify wear or damage and avoid accidents associated with neglected components. Unlike emergency repairs, preventive motorcycle maintenance gives you the power to keep your machine ready for the road at all times. By regularly following a comprehensive motorcycle maintenance checklist, you ensure every ride is safe, enjoyable, and free of unwelcome surprises. Remember: a little time spent on regular inspections can save you from major headaches and expenses later. This foundation is the secret behind long-lasting, reliable motorcycles and the reason so many riders swear by consistent upkeep. Don’t wait for those warning signs—proactivity pays off every time. "A well-maintained motorcycle isn’t just safer; it delivers a smoother, more enjoyable ride every time you hit the road." – Nasty Performance Motorcycle Shop What You'll Learn About Preventive Motorcycle Maintenance Essential preventive motorcycle maintenance tasks every rider should know How to create and follow a complete motorcycle maintenance checklist Common mistakes in preventative maintenance and how to avoid them Expert-approved motorcycle maintenance tips for long-term bike health Understanding Preventive Motorcycle Maintenance: The Basics Defining Preventive Motorcycle Maintenance and Its Importance Preventive motorcycle maintenance involves proactively servicing and inspecting your motorcycle at routine intervals to prevent breakdowns, identify issues early, and extend your bike’s life. Essential tasks include regular engine oil changes, brake pad checks, tire inspections, drive chain lubrication, and seasonal system overviews. Compared to reactive fixes—which address problems after they become severe—preventive maintenance allows you to pay attention to early warning signs like wear and tear or unusual noises before they cause significant damage or a sudden failure. Staying on top of preventive tasks keeps your motorcycle in top condition, ready whenever you are. Incorporating these practices into your regular routine reduces the risk of unexpected failures and extends the longevity of vital components. By monitoring fluids, examining parts for signs of damage, and documenting your maintenance history, you gain peace of mind and keep repair costs down over the long term. Preventive motorcycle maintenance isn’t just about fixing; it’s about anticipating and safeguarding your riding experience, so you get the best performance every time you hit the open road. For riders looking to deepen their understanding of how preventive care can help avoid expensive repairs, exploring additional strategies can be invaluable. You might find it helpful to review this detailed guide on preventive motorcycle maintenance to dodge costly repairs, which covers practical steps to keep your bike running smoothly and your repair bills in check. Preventative Maintenance vs. Reactive Repairs: Key Differences The biggest advantage of preventative maintenance over reactive repairs lies in its proactive approach. While reactive repairs address problems after something goes wrong—such as a worn brake pad leading to brake failure—preventive maintenance identifies and resolves issues during scheduled intervals, offering a smarter and safer alternative. This practice means you seldom have to deal with breakdowns, unexpected downtime, or costly emergency repairs. On the contrary, missed preventative checks can lead to escalating problems and a greater risk of accidents or excessive wear on expensive parts. By practicing timely inspections and fluid changes, you ensure all systems remain reliable and your motorcycle in top condition. Adopting this approach also helps preserve your motorcycle’s resale value while supporting longer, trouble-free adventures. In short, investing time into preventive motorcycle maintenance is the best way to avoid the stress and expense that come with fixing preventable issues, guaranteeing that your rides are consistently smooth and memorable. Creating a Motorcycle Maintenance Checklist: Step-By-Step Approach An effective motorcycle maintenance checklist is your roadmap to keeping your ride in peak form. By breaking down tasks according to mileage, season, and frequency, a checklist helps you stay organized, reinforces good habits, and ensures essential jobs never slip through the cracks. Begin by reviewing your owner’s manual for manufacturer-recommended intervals and supplement with common-sense checks, such as visual inspections for dry rot, signs of wear, and proper oil and filter changes. Logging completed tasks helps identify recurring issues early, reinforces your maintenance routine, and even supports lower motorcycle insurance premiums by demonstrating consistent care. This structured method makes sure you never skip a crucial step, reducing the risk of costly oversights. Periodically review your checklist to account for environmental factors, such as frequent wet conditions that require extra chain lubrication or extended storage where battery care is vital. When in doubt, consulting a professional mechanic or using a sample maintenance checklist (like the one below) will provide a solid starting point for most riders, whether you’re a daily commuter or only ride on weekends. Sample Motorcycle Maintenance Checklist Task Recommended Frequency Check tire pressure Before every ride Lubricate chain Every 500 miles Inspect brakes Every 1,000 miles Change engine oil Every 3,000-5,000 miles Replace air filter Every 10,000 miles or yearly Essential Preventive Motorcycle Maintenance Tasks Checking and Changing Engine Oil: Preventative Maintenance Must The heart of every great maintenance checklist is regular engine oil care. Engine oil lubricates internal moving parts, reduces friction, and carries heat away from vital areas. Over time, oil degrades, collects contaminants, and loses its protective properties, putting your engine at risk of accelerated wear or catastrophic failure. To avoid these issues, check your oil level before each ride, paying attention to oil color and clarity. Change your oil and oil filter at the intervals recommended by your owner’s manual—usually every 3,000–5,000 miles—using manufacturer-approved products for your specific motorcycle. Skipping oil changes or using the wrong oil can result in increased wear and tear, reduced performance, and long-term engine damage. Prioritize this preventative maintenance step to keep your motorcycle in top condition and ready for every adventure. For best results, always warm up your engine before draining old oil. This helps contaminants flow out more easily. Don’t forget to properly dispose of old oil and install a fresh filter during each change. Regular oil maintenance keeps your bike running smoother, quieter, and more efficiently while minimizing unforeseen breakdowns and extending your engine’s life. Tire Care, Pressure, and Tread Inspection in Motorcycle Maintenance Your tires are the only connection between you and the road, making their care critical to both safety and performance. Begin every ride by checking tire pressure with an accurate gauge, and adjust per the manufacturer’s specs—under-inflated or over-inflated tires can severely affect handling. Next, inspect the tread for signs of wear, dry rot (cracking), or embedded debris. Bald or damaged tires not only reduce traction but put you at risk for blowouts, especially at high speeds or in wet weather. Always replace tires that show signs of excessive wear, dry rot, or bulging. Don’t overlook sidewalls and valve stems in your visual inspection; both should be free of cuts, punctures, or signs of long-term wear and tear. By prioritizing tire care in your motorcycle maintenance routine, you ensure every journey starts with a reliable foundation, preventing abrupt issues and providing the grip and stability essential for safe riding. Incorporate a test ride after every tire change or significant pressure adjustment, listening and feeling for unusual vibrations or excessive play. This final check guarantees you’re ready for the road and have addressed any mounting or alignment problems before they develop into dangerous situations. Chain, Sprockets, and Lubrication: An Ongoing Maintenance Checklist The drive chain and sprockets experience constant stress and are critical to your motorcycle’s performance. Without regular care, chains lose lubrication, stretch, or develop tight spots, leading to premature wear or even dangerous failures. Make it a habit to visually inspect your drive chain before each ride, looking for rust, stiff links, or signs of damage. Proper chain slack should match the owner’s manual guidelines; excessive play can reduce power delivery or allow chain derailment. Lubricate your chain every 500 miles, or more frequently after wet rides. Use a motorcycle-specific chain lube and inspect the sprockets for hooked or worn teeth every 1,000 miles. Neglecting these elements in your preventative maintenance plan can lead to expensive repairs, compromised safety, and reduced efficiency. A well-lubricated, tensioned drive chain maximizes performance, supports smoother shifting, and minimizes wear on related components, ensuring a longer-lasting drivetrain. Brake Inspection and Fluid Checks in Preventive Motorcycle Maintenance Your brake system is essential for responsive and safe riding. Regularly inspect brake pad and disc thickness for signs of wear, replacing brake pads if they fall below the manufacturer’s minimum specification. Examine brake lines for cracks, leaks, or other signs of damage. Pay close attention to the color and level of brake fluid—old, dark, or contaminated fluid can result in decreased braking performance and even failure. A good maintenance checklist includes checking your brakes every 1,000 miles and replacing brake fluid as recommended—usually every one to two years—to maintain optimal stopping power. After service, a test ride (with light braking) ensures your adjustments provide full, reliable performance. Riders who stay on top of preventative maintenance for brakes can avoid dangerous situations and keep their motorcycles in top condition for years to come. Establishing a routine for brake maintenance catches issues early, from worn components to fluid-related concerns, and ensures you have the immediate stopping power needed for every ride, no matter the distance or conditions. Beyond the Basics: Advanced Preventive Motorcycle Maintenance Electrical System and Battery Maintenance Checklist Today’s motorcycles are more dependent than ever on reliable electrical systems. To keep your battery, lights, and electronics functioning flawlessly, perform periodic visual inspections of wiring harnesses for wear or damage, and clean battery terminals to prevent corrosion. Check that all lighting—headlights, turn indicators, brake lights—operates correctly before each ride, and ensure no flickering or intermittent failures occur. Battery health is vital, especially after storage or during cold seasons. Test your battery with a voltmeter and ensure it maintains a full charge; if it fails to hold a charge after reconditioning, replace it. In addition, keep an eye out for blown fuses, weak starter sounds, or any wiring showing signs of fraying. These steps make electrical issues less likely and guarantee that your high-tech systems remain trouble-free for the long time you own your motorcycle. Advanced regular maintenance of your electrical system means smoother starts, consistent performance of all digital and analog instruments, and a lower risk of being caught off-guard by a dead battery in the middle of nowhere. This critical area often goes overlooked, so add it to your ongoing maintenance checklist to cover all bases. Suspension and Steering Checks for Preventative Maintenance Your suspension and steering assemblies are responsible for stability, comfort, and handling. Start with a visual inspection for leaks at fork seals or shock absorbers and check for signs of excessive play or wear in the bearings and pivot points. Pay attention to changes in handling, such as wobbling, uneven tire wear, or pulling to one side. Over time, lubricants in the steering and suspension can degrade, potentially leading to a rougher ride or loss of control. Consult your motorcycle’s manual for proper settings and adjustment intervals. Annual maintenance should include fresh fluid in the front forks and examination of rear suspension components. These systems require careful adjustment to match your riding style, load, and road conditions. Keeping your suspension and steering systems in peak condition will not only extend their lifespan but keep your motorcycle nimble, safe, and enjoyable through every curve and straightaway. Common Preventive Motorcycle Maintenance Mistakes and How to Avoid Them Overlooking the maintenance checklist steps Using incorrect fluids or lubricants Ignoring manufacturer preventative maintenance intervals Forgetting seasonal maintenance tasks Skipping test rides after servicing Even experienced riders fall into common traps that can compromise their bike’s health. Forgetting a motorcycle maintenance checklist step (like lubricating the chain or changing brake fluid), using non-recommended products, or ignoring seasonal preparation lead to bigger issues down the road. Always double-check manufacturer guidelines, mark your calendar for preventative maintenance intervals, and stay consistent—your motorcycle and wallet will benefit. Never skip a post-service test ride to detect issues early, ensuring your adjustments provide the intended safety and performance improvements at every stage. Ultimately, preventive motorcycle maintenance is about intention and attention—investing a little effort now can save a lot of hassle, expense, and risk later. If in doubt, get guidance from professionals or follow comprehensive checklists used by trusted shops for best results. Watch: People Also Ask: Preventive Motorcycle Maintenance FAQs What is the preventive maintenance of a motorcycle? Preventive motorcycle maintenance involves performing regular checks and servicing tasks, such as oil changes, brake inspections, and tire pressure monitoring, to ensure your bike operates safely and efficiently while reducing the risk of unexpected breakdowns. What is the 4 second rule on a motorcycle? The 4 second rule is a safety principle recommending motorcyclists maintain at least four seconds of distance between their bike and the vehicle ahead, providing ample time to react to sudden stops or obstacles. Which bike is most liked by girls? Preferences vary widely, but lightweight, stylish, and easy-to-handle motorcycles—such as cruisers and entry-level sport bikes—are commonly favored among women for comfort and manageability. What does 2 fingers up mean on a motorcycle? The '2 fingers up' gesture is a popular motorcyclist greeting, symbolizing camaraderie and respect between riders on the road. Pro Tips From Professionals: Preventive Motorcycle Maintenance Best Practices Regular use of a motorcycle maintenance checklist prolongs lifespan Consult your owner's manual for preventative maintenance intervals Keep a log of every maintenance task completed Never skip tire, oil, or brake inspections Incorporate visual and auditory checks after every ride "Preventive motorcycle maintenance is your first line of defense against costly repairs and dangerous failures." – Shop Mechanic Key Takeaways: Performing Effective Preventive Motorcycle Maintenance Preventive motorcycle maintenance boosts bike safety and longevity Following a regular maintenance checklist prevents common failures Even minor proactive repairs save time and money in the long run Ready to Ride? Schedule Your Preventive Motorcycle Maintenance Service with Experts Your motorcycle deserves the best care—don’t wait until there's a problem. Call Nasty Performance Motorcycle Shop today: 847-458-4858 to book your preventive maintenance and enjoy every ride with confidence! If you’re eager to take your motorcycle care to the next level, there’s always more to discover about keeping your ride in optimal shape. Delving into broader strategies for preventive maintenance can help you anticipate issues before they arise and truly maximize your bike’s performance and longevity. For a comprehensive perspective on how proactive upkeep can save you from unexpected expenses and keep your adventures on track, explore our in-depth article on preventive motorcycle maintenance to dodge costly repairs. It’s the perfect next step for riders who want to stay ahead of the curve and enjoy worry-free journeys for years to come.

Terms of Service

Privacy Policy

Core Modal Title

Sorry, no results found

You Might Find These Articles Interesting

T
Please Check Your Email
We Will Be Following Up Shortly
*
*
*