cropper
update

Nasty Performance ~ 847-458-4858 

update
  • Blog Home
  • Categories
    • Motorcycle Maintenance
    • Riding Tips & Preps
    • Safety & Inspection
    • Customizations & Upgrades
    • DIY Motorcycle Repairs
    • Motocycle Audio Systems
    • Motocycle Seasonal Care & Storage
    • Engine, Electrical Performance
  • Bike Night
  • Nasty Performance Motorcycle Shop
June 03.2026
1 Minute Read

Common Issues with Motorcycle Bluetooth Speaker Setup Every Rider Should Know

Did you know that up to 30% of new motorcycle stereo system owners experience connectivity issues within the first month of installation? If you thought pairing your motorcycle’s Bluetooth speakers was going to be seamless, you’re not alone in facing unexpected roadblocks. From sound quality dips to voice command misfires, these hidden challenges can impact your entire ride—and your audio experience. Whether you’re a seasoned biker yearning for superior audio or a newcomer trying to avoid common problems, understanding these pitfalls can lead to a flawless highway soundtrack.

Unlocking the Truth: Surprising Facts About Common Issues with Motorcycle Bluetooth Speaker Setup

"Did you know that up to 30% of new motorcycle stereo system owners experience connectivity issues within the first month of installation?" – Industry Insider

Motorcycle Bluetooth speaker setup isn’t as plug-and-play as many would hope. Riders across the globe report frequent interruptions with their stereo system, unexpected dropouts, challenges with handlebar speakers, and difficulty harnessing the power of advanced features like voice command. The truth about common issues with motorcycle Bluetooth speaker setup is that they often stem from a combination of factors—device compatibility, installation errors, or Bluetooth connectivity limitations. Many riders choose Bluetooth-equipped systems for the promise of hands-free convenience and great sound, but soon discover that achieving superior sound quality often takes troubleshooting and patience.

Beyond the promise of a better audio experience at highway speeds, many find themselves stuck with muffled audio quality, frustrating disconnects, or difficulties controlling their stereo system via voice command. The good news is that with a bit of guidance, these common problems are avoidable—delivering the superior performance motorcycle stereo systems promise. Let’s dive deeper into what you need to know to sidestep audio setbacks and enjoy every mile of your favorite road tunes.

What You'll Learn About Common Issues with Motorcycle Bluetooth Speaker Setup

  • Identify the most frequent problems with motorcycle stereo and Bluetooth connectivity
  • Understand the impact of common issues on sound quality and audio experience
  • Explore troubleshooting steps to resolve pairing, sound, and voice command failures
  • Review expert tips for optimal motorcycle stereo system installation

Modern motorcycle handlebars with integrated Bluetooth speakers and confident rider adjusting the stereo controls in scenic natural lighting for motorcycle stereo system detail.

Understanding Motorcycle Stereo Systems: The Foundation of Bluetooth Speaker Setup

Before diving into the details of common problems, it's vital to understand how your motorcycle stereo system actually works. The system's core includes a head unit, amplifier (often upgraded with an amp kit or amp kits for enhanced audio quality), and handlebar speakers. These components work together to deliver great sound and clear communication at highway speeds, even when wind noise and engine noise threaten to disrupt your ride. The latest systems deliver an advanced audio experience with superior performance, allowing you to stream your favorite tracks while navigating tough road conditions.

Modern motorcycle stereo systems are engineered to withstand the elements and prioritize both sound quality and long-term battery life. However, achieving optimal audio performance requires every component—from handlebar speakers to Bluetooth modules—to function in harmony. Compatibility between the system’s operating system and your smart device is crucial for seamless Bluetooth connectivity and flawless voice command interactions. When even a single element isn’t configured properly, the entire experience can suffer.

Components of a Motorcycle Stereo System and Key Features

The essential features of today’s motorcycle stereo systems include the head unit (which acts as the central control), robust amplifier units, waterproof handlebar speakers, and Bluetooth modules for wireless connectivity. Each piece contributes to delivering superior audio—resisting wind and engine noise, even at highway speed. Many systems are now designed to integrate voice command capability, which boosts safety by enabling hands-free operation for music and navigation. If one component falls short—for instance, if your amp kit isn’t powerful enough or your speakers aren’t weatherproof—your audio quality will suffer.

Additional features to consider are weather-resistant construction, streamlined mounting systems that secure handlebar speakers without vibration, and firmware updates that optimize Bluetooth connectivity protocols for your motorcycle model. Understanding these technical details helps riders choose a system that delivers a consistently high-quality, resilient audio experience, regardless of road conditions and speed.

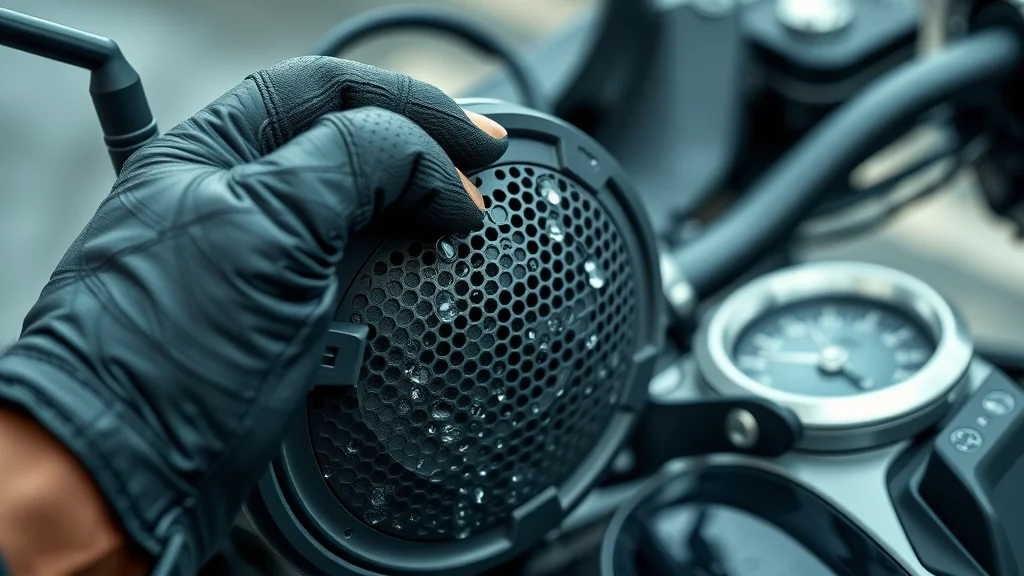
How Handlebar Speakers and Stereo Systems Interact with Bluetooth Connectivity

Handlebar speakers are more than just basic audio output devices—they are crucial links in your motorcycle stereo’s communication chain. When properly installed, they seamlessly sync with your head unit through Bluetooth technology, but only if the Bluetooth module is installed in an optimal location. Bluetooth connectivity is what allows you to interact with your audio using your smartphone, making it easy to adjust volume, clarify navigation cues, or manage playlists mid-ride. But disruptions can occur easily: If there’s signal interference, a weak connection, or outdated firmware, common problems can emerge—manifesting as poor sound quality or unexpected drops in audio experience.

Understanding how each part of the motorcycle stereo system works together—and the vital role Bluetooth connectivity plays—sets a foundation for troubleshooting. By aligning your handlebar speakers, stereo system, and Bluetooth functions, you gain control over your audio experience, helping prevent the connectivity issues that so many riders face within weeks of setup.

For riders looking to further minimize audio disruptions and keep their systems performing at their best, it's also important to consider how seasonal changes can impact your bike’s electronics and sound equipment. Discover practical maintenance strategies in this guide to seasonal bike care secrets every rider must know, which covers essential steps to protect your motorcycle’s audio and electrical systems year-round.

The Most Common Issues with Motorcycle Bluetooth Speaker Setup

  • Bluetooth connectivity interruptions
  • Poor sound quality and audio experience
  • Voice command malfunctions
  • Compatibility issues with motorcycle stereo systems
  • Frequent disconnection of handlebar speakers

Riders choose motorcycle stereo systems with the hope of achieving that superior audio experience on open roads and highway speeds. However, almost immediately after installation, many notice issues ranging from random Bluetooth disconnections to muffled audio or even total voice command failure. Incompatibility often occurs when the Bluetooth module or handlebar speakers don’t match the motorcycle’s make or operating system, making seamless communication impossible. Battery capacity can also influence signal strength, especially when high-powered amp kits and stereo systems push their limits.

Common complaints also include persistent wind noise overpowering songs or navigation prompts, and the frustration of constant reconnecting between devices. Not all Bluetooth protocols play well together, especially with older or mismatched stereo system components. These problems persist despite manufacturers’ claims about superior performance, highlighting the need for a more strategic approach to both installation and system maintenance.

Bluetooth Connectivity Problems in Motorcycle Stereo Systems

Anyone who has attempted to connect their smartphone with handlebar speakers knows that Bluetooth connectivity can be a real pain point in motorcycle stereo systems. Even after following setup instructions, some riders find that devices simply refuse to pair, or, if they do, experience frequent disconnections which break up the audio experience. The reasons range from software and firmware incompatibility to environmental factors like nearby engine noise or even physical obstacles blocking the Bluetooth module.

The impact is immediate: Patchy music playback, lost navigation cues in the middle of unfamiliar city streets, or inability to take calls safely through your voice command system. These complaints highlight how critical stable Bluetooth connectivity is for both safety and enjoyment. But with the right diagnostic approach and troubleshooting, most issues can be prevented or resolved before they turn your ride into a tech nightmare.

Symptoms and Causes of Bluetooth Pairing Issues

The first sign of trouble with motorcycle Bluetooth speaker setup is often an inability to pair or maintain a solid connection between your smartphone and the stereo system. This may show as devices refusing to recognize each other, repeated requests for inputting a pairing code, or even successful pairing followed by sudden dropouts at random intervals. Many times, these symptoms are indications of underlying problems like outdated firmware, interference from other wireless signals, or residual data from previous pairings clogging the system.

In some cases, proximity to other Bluetooth devices, engine or wind noise, highway speeds, and fluctuating battery life can also contribute to intermittent connectivity. If your Bluetooth module is not installed where the signal can travel freely, or if certain components aren't compatible with each other, the odds of experiencing these common problems increase. Recognizing these patterns is essential for any rider who wants to maintain superior audio reliability on every ride.

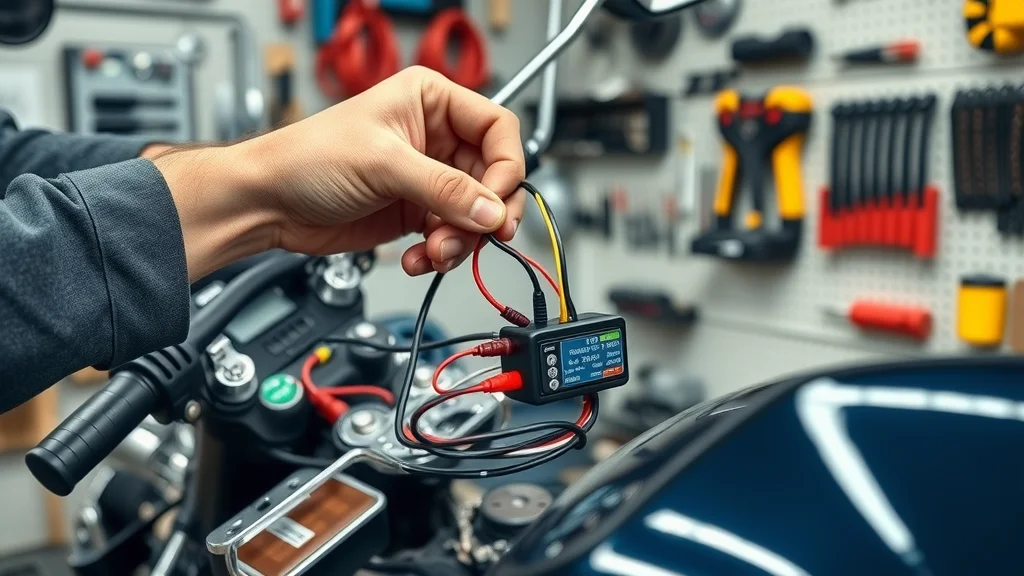
Steps to Troubleshoot Common Bluetooth Connectivity Difficulties

If you discover ongoing Bluetooth connectivity problems, there are proven steps to resolve them. Begin by restarting both the stereo system and your mobile device, then remove all previous pairings and start a fresh connection. Ensure your firmware is up to date—manufacturers regularly push out fixes for Bluetooth issues that can restore stable connections. If the problems persist, check the placement of your Bluetooth module and verify no physical barriers are hindering the signal. Repositioning the module can improve signal strength and reduce interference from engine noise or weather conditions.

For stubborn cases, examine whether your motorcycle model or operating system is fully compatible with your chosen handlebar speakers and stereo system. Isolate variables by disconnecting other Bluetooth devices that may be in range and interfering with your connection. Finally, refer to your manufacturer’s troubleshooting steps or contact a service center for advanced diagnostics, especially if your audio experience is still disrupted after following these steps.

Frustrated motorcyclist troubleshooting Bluetooth connectivity in motorcycle stereo system with handlebar speakers in garage setting.

Sound Quality Concerns: Elevating Your Motorcycle Audio Experience

Outstanding sound quality is at the heart of a premium motorcycle audio experience. Yet, riders often encounter muffled, distorted, or weak sound from their handlebar speakers—even after investing in high-quality components. Even top-tier stereo systems can fall short at highway speed, as wind noise, engine noise, and road conditions impact clear audio delivery. Addressing these issues requires a systematic approach to diagnosing both installation problems and hardware limitations.

To achieve great sound, it’s critical to match speaker wattage with amplifier output, review wiring connections, and make sure weatherproof handlebar speakers are properly secured and angled. Riders should not underestimate the value of amp kits to boost signal transmission and cut through wind interference. Ultimately, the best audio experience results from fine-tuning and occasionally upgrading components to suit your unique motorcycle model and typical riding environment.

Diagnosing Sound Quality Issues in Your Motorcycle Stereo System

Does your music sound garbled or lack volume and clarity at highway speeds? Diagnosing sound quality issues starts with a careful check of each element in your motorcycle stereo system. First, inspect all wiring to ensure there are no loose or frayed connections which can cause intermittent audio quality glitches. Next, make sure that both the head unit and amp kit provide enough power for your handlebar speakers—an underpowered amp will result in muffled or distorted audio, especially when you increase the volume to counteract road and wind noise.

Environmental factors cannot be ignored. Rainwater or condensation getting inside speaker grilles can degrade both immediate and long-term sound quality, highlighting the need for weatherproof speakers. Incompatible components (for example, pairing outdated Bluetooth modules with the latest high-wattage handlebar speakers) can lead to persistent audio performance issues. Conduct tests at both low and highway speeds to assess whether problems are constant or specific to certain circumstances—this diagnostic approach allows you to isolate audio issues before seeking further support or servicing.

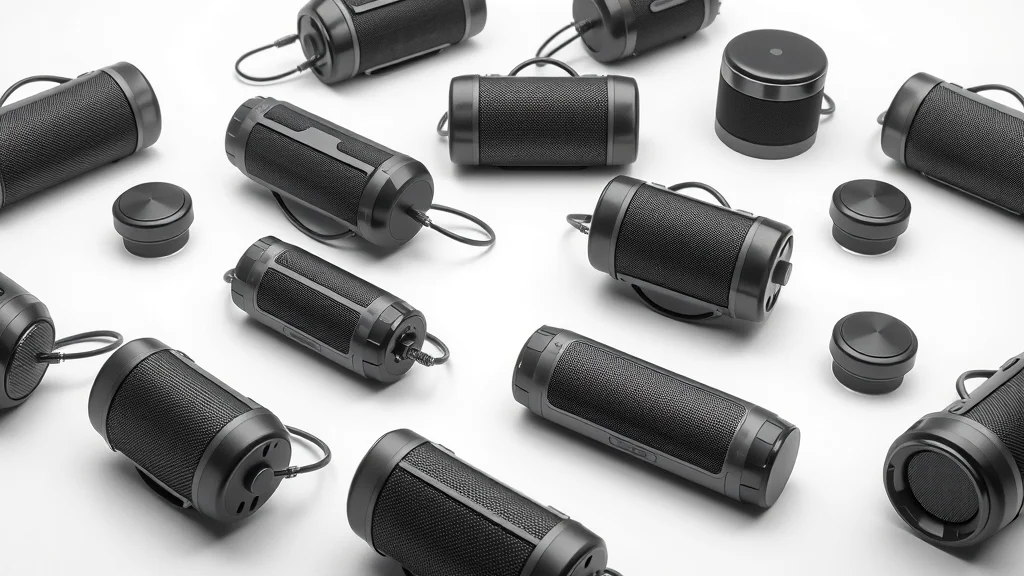
Top Recommendations for Clearer Handlebar Speakers

To optimize your audio experience, start by using weatherproof, high-sensitivity handlebar speakers capable of superior audio output in harsh environments. Install them at optimal angles—to direct sound directly toward your ears and minimize loss to the wind—as orientation can significantly affect the final audio quality. If sound remains weak at highway speeds, consider upgrading your amp kit and double-checking all wiring connections for maximum power delivery and minimal signal loss.

Firmware updates often improve Bluetooth connectivity and audio performance, so keep your stereo system up to date for better clarity and reliability. Finally, always calibrate your system by adjusting equalizer settings and testing both low and high-frequency ranges to achieve great sound. Remember, every motorcycle model and rider preference is different—periodic system maintenance and occasional upgrades yield the best long-term results.

"When the stereo system is not matched properly with the speaker wattage, riders often report muffled or distorted audio experience." – Audio Technician

Close-up of waterproof motorcycle handlebar speaker with gloved biker hand adjusting audio settings, emphasizing sound quality and weatherproof features.

Voice Command Features and Their Common Problems in Motorcycle Bluetooth Speaker Setup

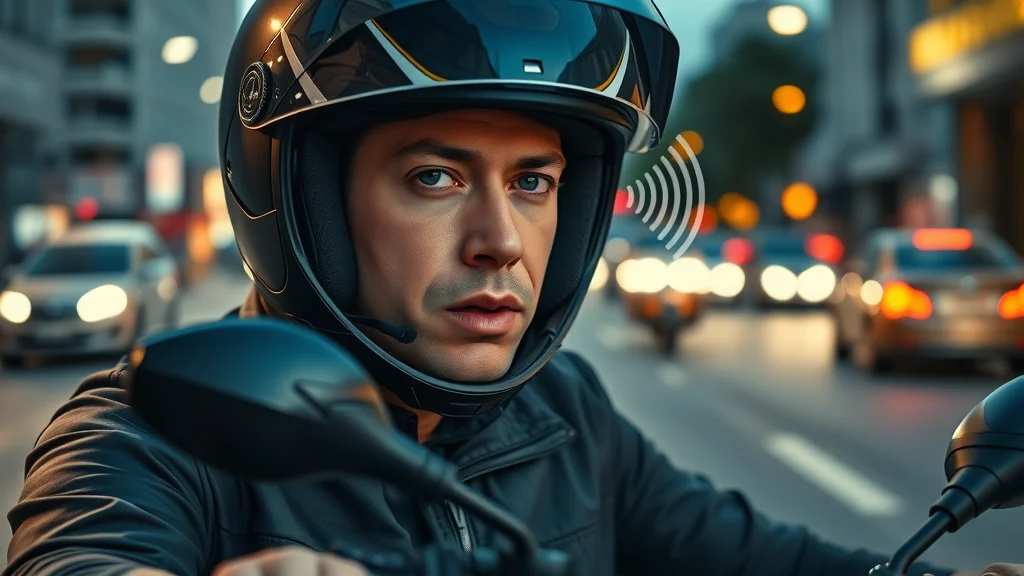
Voice command is a crucial innovation in modern motorcycle stereo systems, enabling riders to control music, answer calls, and trigger navigation at highway speeds while keeping their hands firmly on the bars. However, this feature also introduces new challenges. From under-responsive microphones to misinterpretations caused by wind and road noise, voice command issues can undermine the safety and convenience these systems promise.

Many riders discover that their motorcycle stereo system’s voice command performance is inconsistent. Sometimes commands are misunderstood, only partially received, or ignored entirely. This is especially true if the Bluetooth module’s firmware is outdated, or if the system is not calibrated for a rider’s specific voice or accent. Addressing these issues early is key to leveraging the full potential of voice command and maintaining a safe, enjoyable ride at all speeds.

Challenges with Voice Command Integration

The biggest challenge with integrating voice command features into your motorcycle stereo system is achieving consistent reliability in real-world riding environments. At highway speeds, engine and wind noise can easily drown out spoken commands, confusing the system or triggering unwanted actions. Not all handlebar speakers have the microphone sensitivity or directional pickup required to capture clear communication, especially if not installed near the rider’s mouth or shielded from airflow.

Software mismatches and outdated firmware can also limit voice command functionality—even in expensive, top-rated motorcycle stereo systems. Riders may find that certain commands aren’t recognized, or that their voice assistant activates unintentionally due to vibration or ambient sounds. Understanding your system’s limitations and working within those parameters is the first step to achieving reliable voice command performance on every ride.

Tips for Reliable Voice Command Performance

To improve voice command integration, begin with a system calibration session—many motorcycle stereo systems allow you to “train” voice assistants to better understand your tone and accent. Position Bluetooth microphones as close as possible to your mouth, shielding them from wind noise with foam covers or mic placement inside a helmet. Stay current on firmware updates, since many voice command glitches are resolved with regular software patches issued by manufacturers.

Avoid giving commands at peak highway speeds or in high wind and engine noise environments—instead, perform most control actions while stopped or riding slowly. If problems persist, check compatibility between handlebar speakers, microphones, and your Bluetooth module’s version. Sometimes, swapping out components or consulting your service center for a quick inspection can yield superior performance and a safer hands-free audio experience.

Motorcyclist using voice command with visible Bluetooth mic and focused expression, highlighting advanced motorcycle stereo features for clear communication while riding.

Installation Mistakes and Their Role in Common Issues with Motorcycle Bluetooth Speaker Setup

  • Improper wiring of the stereo system
  • Faulty Bluetooth module placement
  • Using incompatible motorcycle stereo system components

The foundation of a flawless motorcycle audio experience lies in the care and accuracy invested during installation. Improper wiring of the stereo system, rushed placements of the Bluetooth module, or using mismatched components are all frequent sources of frustration for riders. Faulty connections can result in poor sound quality, constant Bluetooth connectivity issues, or even completely non-responsive systems. Even something as simple as overlooking secure grounding or not consulting a manual can lead to persistent audio and connectivity challenges.

Component compatibility matters more than many realize—pairing a high-powered amp with low-wattage handlebar speakers may not only result in poor sound but could damage sensitive hardware. Similarly, Bluetooth modules mounted too close to metal surfaces or buried beneath other components may suffer from signal interference or range problems. Reviewing each system part before purchase and installation helps prevent these common problems, saving both time and repair costs down the line.

Technician installing motorcycle stereo system with careful wiring and Bluetooth module connection for optimal audio and Bluetooth performance.

Checklist: Avoiding Problems in Your Motorcycle Bluetooth Speaker Setup

  1. Review stereo system instructions thoroughly
  2. Test Bluetooth connectivity before final assembly
  3. Calibrate sound quality for your handlebar speakers
  4. Enable and test all voice command features
  5. Verify compatibility of all motorcycle stereo components

Using this checklist, every rider can significantly reduce the risk of dealing with common problems in their motorcycle Bluetooth speaker setup. Whether you’re installing a new system or upgrading your handlebar speakers, following each step helps protect your investment while ensuring an audio experience that meets—or exceeds—expectations. If you need expert assistance at any stage, don’t hesitate to consult your local service center for troubleshooting or professional installation.

Expert Tips for an Optimal Motorcycle Stereo and Bluetooth Setup

  • Keep firmware up to date for enhanced bluetooth connectivity
  • Use weatherproof speakers for better sound quality
  • Install handlebar speakers at optimal angles
  • Secure all stereo system connections to avoid short-circuits

Experience has shown that keeping your motorcycle stereo system updated and well-maintained is just as vital as the initial installation. Firmware updates can dramatically improve Bluetooth connectivity and audio performance, resolving minor glitches with simple downloads. Investing in weatherproof speakers ensures you get great sound–rain or shine–without risking speaker or system failure. Angling handlebar speakers correctly prevents wind noise from muddying your favorite tracks, while tightly secured wiring guards against sudden power loss or intermittent signals at highway speeds.

Routine checkups are wise—even if you don’t notice any immediate issues, catching a loose wire or outdated firmware before your next ride averts bigger problems in the future. Pair these tips with regular calibrations to keep your audio experience clear and consistent, regardless of road conditions or the demands of your chosen highway adventure.

Visual Guide: Video Tutorials for Mastering Motorcycle Bluetooth Speaker Setup

This instructional video details step-by-step techniques for connecting Bluetooth speakers to your motorcycle stereo system. Topics covered include resolving pairing failures, identifying common connectivity drop-outs, and optimizing voice command reliability—demonstrated on location in a professional bike workshop for real-world clarity.

Watch how experts adjust amplifier settings, select weatherproof speakers, and correctly position handlebar units to eliminate distortion and maximize audio quality, even at highway speeds. These visual guides can help you avoid the most common problems and enjoy a flawless listening experience on every ride.

People Also Ask: Motorcycle Bluetooth Speaker Setup FAQs

How do I fix the Bluetooth speaker pairing problem?

To resolve pairing issues with your motorcycle Bluetooth speaker setup, begin by restarting both your stereo system and mobile device. Remove previous pairings from each device to prevent conflicts, then attempt a fresh connection. Make sure your devices' firmware is current, as updates often correct Bluetooth connectivity glitches. If problems persist, optimize Bluetooth module placement for signal strength and check for compatibility with your motorcycle stereo system and handlebar speakers before attempting to pair.

Why is my Bluetooth speaker glitchy?

Bluethooth speakers may become glitchy due to signal interference, outdated firmware, or poor integration with your motorcycle stereo system. Common solutions include re-pairing devices, disconnecting other wireless electronics nearby, and updating your device firmware. Ensuring all system components are compatible and properly connected can prevent recurring glitches affecting your audio experience, especially at highway speeds or in challenging road conditions.

Why do my Bluetooth speakers keep going in and out?

Frequent audio drop-outs can result from exceeding Bluetooth range, encountering physical or electronic interference (such as from engine noise or other wireless devices), or from low battery capacity in either the stereo system or mobile device. To remedy this, keep devices within recommended distance, minimize signal obstacles, and charge both stereo system and smartphone prior to rides. If drop-outs continue, reposition the Bluetooth module or update system firmware for improved connectivity.

How do motorcycle Bluetooth speakers work?

Motorcycle Bluetooth speakers connect wirelessly to the stereo system head unit via Bluetooth protocols. Audio streams from your smartphone or GPS through the system, delivering music or navigation directly to handlebar speakers. Voice command functionality allows you to control playback, answer calls, or adjust settings hands-free, enhancing both sound quality and ride safety at any speed.

Comparison Table: Common Issues with Motorcycle Bluetooth Speaker Setup

Issue Symptom Troubleshooting Step Potential Fix
Pairing Failure Unable to connect via Bluetooth Restart devices, clear pairings Re-pair, update firmware
Poor Sound Quality Muffled/distorted audio Check connections, adjust settings Replace cables/speakers
Voice Command Issues No/erratic response Reset system, re-train commands Firmware update
Frequent Disconnections Audio cuts out Check range, interference Minimize obstacles, reset Bluetooth

Collection of modern motorcycle Bluetooth speaker units emphasizing waterproof and stereo system features in slick product photo.

Frequently Asked Questions: Troubleshooting Motorcycle Stereo System and Bluetooth Setups

  • What is the ideal distance for Bluetooth connectivity in motorcycle stereo systems?
  • How can I improve sound quality on my handlebar speakers?
  • What steps can I take if voice commands aren't working?
  • Are all motorcycle stereo systems compatible with Bluetooth handlebar speakers?

Key Takeaways: Avoiding Common Problems with Motorcycle Bluetooth Speaker Setup

  • Understand core setup components for a reliable audio experience
  • Troubleshoot issues with proven, expert-endorsed steps
  • Regular maintenance extends your motorcycle stereo system’s life
  • Leverage voice commands for safer riding

Ready for a Flawless Ride?

"Ensure your next ride is uninterrupted by common Bluetooth speaker issues. Call Nasty Performance Motorcycle Shop Today: 847-458-4858 for expert help!"

If you’re committed to keeping your motorcycle’s audio system—and the rest of your bike—in peak condition, don’t stop here. Expanding your knowledge with broader maintenance strategies can help you avoid not just audio hiccups, but a range of seasonal challenges that affect performance and longevity. Explore seasonal bike care secrets every rider must know for expert advice on protecting your ride through every climate and condition. By integrating these advanced care tips with your Bluetooth setup know-how, you’ll ensure every journey is smooth, safe, and sonically satisfying—no matter what the road or weather brings.

Motocycle Audio Systems

0 Comments

Write A Comment

*
*
Please complete the captcha to submit your comment.
Related Posts All Posts

Upgrade Ideas for Motorcycle Audio System Wiring Guide That Will Change Your Ride

Did you know that a properly installed motorcycle audio system can reduce wind noise fatigue and mental exhaustion by up to 40% during long rides? More than just a luxury, a well-wired motorcycle stereo system can completely reshape the way you experience every mile, blending your favorite tunes into your journey and ensuring sound quality even in challenging environments. In this motorcycle audio system wiring guide, you’ll unlock upgrade ideas and step-by-step techniques to transform your ride into a rolling soundstage. Unlocking Superior Sound: Why Every Rider Needs a Motorcycle Audio System Wiring Guide For many riders, music is not just a way to pass the time—it’s a vital companion that enhances mood, increases focus on the road, and makes every trip more memorable. Yet, a motorcycle’s challenging environment means that achieving clarity and reliability with your audio system requires more than just basic installation. Common mistakes in stereo system wiring can result in a poor power source connection, weak sound, or system failure just when you need your audio setup the most. That’s where a comprehensive motorcycle audio system wiring guide comes into play: arming you with practical tips for installing, connecting, and upgrading your motorcycle stereo system safely and efficiently. Whether you’re tackling a daunting task like upgrading your entire system or just want to ensure your motorcycle radio is securely in place, following a dedicated wiring guide ensures you’re maximizing both performance and product lifespan. This guide is packed with expert-backed strategies, from selecting the right wiring harness to troubleshooting motorcycle speakers for peak audio quality—so you’re never left with static or silence when you crave your favorite tunes the most. As you work through your motorcycle audio system installation, it’s also important to consider how seasonal changes can impact your bike’s electronics and wiring. For practical advice on keeping your motorcycle in top shape year-round, including tips that complement your audio upgrades, check out these essential seasonal bike care secrets every rider must know. "A properly wired motorcycle audio system can completely transform your riding experience by delivering both clarity and reliability—no matter the road ahead. " The Surprising Truths About Motorcycle Audio Systems It’s easy to underestimate the impact a professional-grade audio system can have on your ride. Most stock motorcycle radios are designed with basic functionality in mind, not taking into account the unique acoustics and vibrations experienced at highway speeds. An upgraded, well-planned motorcycle stereo system, with a focus on custom wiring and high-quality components, drastically improves clarity and reduces noise interruptions—even with the roar of your engine and the rush of wind. Another surprising truth: incorrect wiring doesn’t just result in distorted audio; it can jeopardize both the longevity and reliability of your motorcycle audio. Poorly routed speaker wires or neglected ground connections can lead to electrical shorts, drained batteries, or even system malfunctions while you’re miles from help. Understanding and following best practices in your wiring diagram and installation process is the gateway to a truly dependable on-road audio setup. How a High-Quality Motorcycle Stereo System Impacts Your Ride Investing in the right motorcycle stereo system is a game changer. Not only does it enrich your ride with crisp, immersive sound—whether you’re blasting classic rock or streaming podcasts—but it also adds valuable features like hands-free Bluetooth connectivity, water-resistant controls, and powerful amplifiers that keep your audio distortion-free. These systems are built for the rigors of riding, meaning your focus stays on the road while your favorite soundtracks seamlessly accompany the journey. Moreover, a thoughtfully installed audio system boosts the resale value of your motorcycle and reflects genuine rider craftsmanship. When all cables, fuses, and connections are secure, you benefit from extended stereo system life, convenient diagnostics for troubleshooting, and the confidence to ride in all weather conditions with uninterrupted sound quality. Whether you enjoy solo journeys or weekend group rides, your upgraded motorcycle audio system makes every adventure more enjoyable—and uniquely yours. What You’ll Learn in This Motorcycle Audio System Wiring Guide Critical safety precautions for motorcycle stereo installation Step-by-step wiring diagram overview Best practices for motorcycle radio connections Troubleshooting motorcycle speakers and audio systems Expert tips for upgrading your motorcycle stereo system Understanding the Core Components of a Motorcycle Audio System Breaking Down the Typical Motorcycle Stereo System Before you dive into installation or upgrades, it’s essential to get familiar with the main components that make up a quality motorcycle audio system. At its core, your motorcycle stereo system typically includes a motorcycle radio or central head unit, speaker wires that connect to various motorcycle speakers, and, in higher-end setups, one or more amplifiers. The combination of these elements determines not just your maximum volume but also how clearly you can hear your favorite tracks while riding at speed. Understanding the layout and function of each piece is the first step to a successful installation. The motorcycle radio acts as the command center, translating audio signals and controlling inputs from Bluetooth, AUX, or USB. Amplifiers boost the power signal to the speaker wires, ensuring that motorcycle speakers deliver crisp, distortion-free sound. In many upgraded audio system setups, additional features like equalizers, vibration-dampening mounts, or even integrated navigation modules enhance your overall experience. Referencing your motorcycle’s wiring diagram will help you locate both the power source and optimal wiring path for each component, ensuring a safe and reliable installation process. Key Elements: Motorcycle Radio, Amplifiers, and Motorcycle Speakers The key to achieving great sound quality starts with choosing the right parts for your environment. Your motorcycle radio needs to handle the rigors of open-road riding—think water resistance, glove-friendly controls, and robust connections. Amplifiers take the low-level output from your stereo system and boost it to a level that motorcycle speakers can render loudly and cleanly above the noise of the wind and engine. Upgraded motorcycle speakers are equally critical. Look for options specifically designed for outdoor use and the unique acoustics of motorcycles—these are typically more rugged, weatherproof, and capable of maintaining sound clarity even at higher speeds. Proper wiring harnesses, secure the radio techniques, and a focus on speaker connection and alignment all play a part in the flawless performance of your complete motorcycle audio system. With these core elements in place, every twist of the throttle is paired with a rich, distortion-free soundtrack tailored to your taste. Essential Tools and Materials for Your Motorcycle Audio System Wiring Guide Wiring harness and connectors Multimeter Electrical tape and wire strippers Motorcycle audio system manual Quality motorcycle speakers Safety Precautions: Protecting Yourself and Your Motorcycle During Audio System Installation Common Hazards When Installing a Motorcycle Stereo System Installing a motorcycle stereo system may seem straightforward, but overlooking safety precautions can result in costly and even dangerous mistakes. Common hazards include short circuits from incorrectly grounded wires, accidental power surges when connecting to the battery, and the potential for hot tool contact resulting in burns or wire damage. There’s also a risk of damaging bike electronics or interfering with the main wiring harness if you drill holes or splice cables without a clear understanding of your wiring diagram. These issues can affect not only your audio setup but also critical functions like engine management or lighting systems, making it essential to prioritize safety at every step of the installation process. Failing to properly secure wires and components can lead to loose connections that may rattle loose over time, especially with the vibration and bumps typical of road riding. In some cases, improperly routed speaker wires can melt or be sliced by moving parts or hot surfaces, causing failure of your whole system or, worse, starting an electrical fire. This is why experienced installers emphasize careful planning and preventative actions as essential tips for installing any motorcycle audio system upgrade. Expert-Recommended Safety Steps for Motorcycle Audio System Wiring For the safest installation, always start by disconnecting the battery to prevent accidental shocks or shorts. Use insulated wire strippers, a multimeter to check live voltage, and protect every finished connection with electrical tape or heat shrink tubing—this guards against moisture and vibration-related failures. Pay special attention to aligning your wiring harness with the dedicated paths shown in your motorcycle’s wiring diagram—never improvise routing near sharp edges, hot exhausts, or key control cables. Secure the radio and amplifiers with vibration-resistant mounts and double-check ground connections to prevent noise interference. Always avoid bundling audio system wires alongside high-power engine or lighting cables, as electromagnetic interference can disrupt sound quality and cause diagnostic confusion later. If you’re ever unsure about the installation process, consult your motorcycle audio system manual or professional installers who can advise on specific safety precautions unique to your bike’s make and model. Taking these steps will ensure your new sound system is dependable and safe for every adventure ahead. Step-by-Step Motorcycle Audio System Wiring Guide: From Wiring Diagrams to Testing Motorcycle Audio System Wiring Steps Overview (with tips for installing and securing the radio) Step Description Pro Tip 1. Disconnect Battery Ensure safety by disconnecting the negative battery terminal before starting any work. Document original settings and battery connections for easier reassembly. 2. Review Wiring Diagram Study the motorcycle stereo system’s wiring diagram specific to your bike model. Highlight power source and ground connection points before proceeding. 3. Install Wiring Harness Route and connect the wiring harness, keeping wires organized and away from moving parts. Use zip ties and electrical tape for extra security against vibrations. 4. Mount Components Install the motorcycle radio, amplifier, and speakers using vibration-dampening mounts. Double-check tightness to ensure the radio in place won’t loosen over time. 5. Connect Audio System Components Follow the wiring diagram to connect all power, ground, and speaker wires securely. Test connections for continuity using a multimeter before powering up. 6. Testing and Fine-Tuning Reconnect the battery, power up the system, and test all functions. Adjust settings and check sound quality with your favorite music tracks. Understanding and Using a Wiring Diagram for Your Stereo System A dedicated wiring diagram for your specific motorcycle makes a world of difference when installing or upgrading your audio system. This schematic visually maps all connections between your motorcycle radio, amplifier, speakers, and power source, replacing guesswork with clear, actionable steps. Relying on the diagram ensures that every wire is properly routed and that your speaker wires, ground connection, and fuses are positioned exactly as intended by both the bike and audio system manufacturers. Take your time to familiarize yourself with each symbol and pathway on the wiring diagram. Mark high-risk zones such as areas near the battery, engine, or moving suspension parts where improper routing could expose wires to heat or abrasion. By using the wiring diagram as your roadmap, you avoid accidental system shorts or miswiring that could compromise both audio performance and your motorcycle’s overall reliability. Connecting Your Motorcycle Radio and Amplifier Securely The core of a robust audio setup begins with secure connections. Start by running your wiring harnesses from the head unit to each speaker and amplifier location, following the recommended routing shown in your wiring diagram. Use both multimeter and continuity tests to ensure each route has solid, interference-free connectivity. When making speaker connections, always match color-coded wires as indicated, and use insulated crimp connectors to prevent water ingress or accidental short circuits. For the amplifier installation, secure the radio and amp units using rubber or silicone padding to minimize vibration damage. Connect the amplifier’s power and ground leads directly to dedicated terminals, not via daisy-chained splitters, for consistent current delivery. Finally, double-check every connection with gentle tugs and insulate exposed ends with electrical tape or heat shrink—this ensures long-term reliability, especially under harsh riding conditions. When you’re satisfied that all connections are secure, you’re ready to move on to final speaker positioning and initial sound checks. Optimizing Motorcycle Speakers Placement and Connections Where you mount your motorcycle speakers is just as important as how you wire them. For best sound quality, place speakers where they’re least affected by wind turbulence and vibration—commonly in the dashboard, fairings, or custom pods near the handlebars. Use rubber-insulated brackets or vibration-dampening mounts to isolate speakers from engine and road rumble. Ensuring every speaker is phase-aligned (red/positive and black/negative terminals matched across both left and right channels) will boost stereo imaging and clarity, enhancing your listening experience even at speed. As a best practice during installation, test each motorcycle speaker connection individually before final assembly. This helps to quickly catch any weak, reversed, or misrouted wires before they get buried behind bodywork. Use your wiring diagram as a continual reference and finish each connection with a thorough tug test and an extra wrap of electrical tape for security. With optimal placement and secure hook-up, your motorcycle stereo system will grant you crisp highs, defined mids, and deep bass for many rides to come. Testing the Complete Motorcycle Stereo System Once assembly is complete, it’s time for a system-wide test. With the battery reconnected, power up the motorcycle radio and cycle through all audio inputs (Bluetooth, AUX, or USB) to check for signal clarity. Start your engine and gradually increase volume, listening for unwanted distortion, buzzing, or drop-outs that could indicate loose speaker wires or poor ground connection. Move your handlebars fully side to side, confirming that no cables stretch, pinch, or interfere with turning. Don’t skip stress-testing your setup with both calm and energetic tracks—this better reveals any gaps in sound quality or speaker connection problems under realistic riding conditions. If any issue arises, recheck the wiring diagram and connections, paying close attention to speaker polarity, fuse integrity, and secure mounting. Congratulations—you’re now ready to enjoy your upgraded audio system mile after mile! Top Upgrade Ideas to Maximize Your Motorcycle Audio System Upgrading to waterproof motorcycle speakers: These can withstand rain and splashes, ensuring longevity and reliable sound in all conditions. Opting for high-efficiency amplifiers: These deliver more power without draining your motorcycle’s battery, improving sound quality on the go. Integrating Bluetooth capabilities in your motorcycle stereo: Enables you to stream music and receive calls hands-free, keeping your focus on the road. Installing vibration-dampening mounts for the radio: Protects sensitive electronics from bumps and extends the lifespan of your stereo system. Using noise-cancelling audio system components: These help filter out engine and wind noise, enhancing clarity during high-speed rides. Frequently Overlooked Tips for Installing a Motorcycle Audio System Double-checking wire routing and avoiding hot parts Securing all stereo system components against vibrations Ensuring all motorcycle speakers are phase-aligned Keeping the motorcycle stereo’s firmware updated Troubleshooting Common Issues with Motorcycle Audio System Wiring What to Do if Your Motorcycle Stereo System Won’t Power On When your motorcycle stereo system fails to power on, it’s typically due to overlooked basics. First, confirm that your battery is properly connected and charged. Then, inspect the fuse protecting your audio system circuit—it’s a common culprit that can easily blow during the installation process. If the fuse is intact, use a multimeter to check for voltage at the radio’s power source connector; lack of power could indicate a break or poor connector in your wiring harness. Don’t forget to check ground connections. An incomplete or poorly attached ground can prevent power from reaching your motorcycle radio or amplifier. If all wiring appears intact but the stereo system remains dead, disconnect the battery and carefully retrace every connection per your wiring diagram, looking for unseated connectors, pinched wires, or signs of damage. Taking these steps typically resolves over 80% of power-on issues without the need for professional intervention. Diagnosing Distorted Sound from Motorcycle Speakers Distorted audio output usually points to wiring issues or mismatched speaker connections. First, check that each motorcycle speaker wire is firmly attached and fully insulated, with positive and negative terminals matched for phase alignment. Loose, crossed, or uninsulated speaker wires can easily create unwanted noise or static, undermining the sound quality of your motorcycle audio system. Next, confirm your amplifier settings aren’t set too high or mismatched to your speaker’s specifications. Sometimes, adjusting the gain or equalization resolves the distortion. If multiple speakers are involved, isolate the affected channel by unplugging all but one speaker at a time, letting you quickly narrow down the source. Always reference your wiring diagram and audio system manual for guidance, as proper configuration makes all the difference in delivering clear, high-fidelity sound every ride. Resolving Connectivity Issues in Your Motorcycle Audio System Loss of Bluetooth or AUX connectivity can be baffling but is often solved by revisiting the basics. First, check for secure connections at the back of your motorcycle radio or interface module—these frequently loosen over time, especially under high-vibration riding. For Bluetooth issues, ensure your radio’s firmware is up to date and that no other device is trying to hijack the connection simultaneously. If you install additional features, like noise-cancelling modules or secondary control units, confirm that system settings are correct and compatible with your head unit. Frequently, a firmware reset or updating device drivers (following the audio setup manual) resolves stubborn connectivity problems. Keeping connections clean, firmware up-to-date, and cables securely fastened will minimize frustrating dropouts and ensure seamless music playback. Expert Insights: Quotes From Leading Motorcycle Audio Installers "Sound systems are only as good as their weakest connection—always prioritize secure wiring for peak performance. " – Audio Pro Technician People Also Ask: Motorcycle Audio System Wiring Guide [[paa]] Answer: A motorcycle audio system wiring guide is a comprehensive instruction set designed to help riders install, upgrade, and maintain their motorcycle audio setups safely and effectively. With step-by-step diagrams and expert tips for installing audio system components, these guides help you understand the importance of careful wire routing, power source selection, and secure connections for the best sound quality and reliability. If you're aiming for a flawless motorcycle stereo system, this guide will help you avoid common pitfalls—like poor grounding, loose speaker wires, or misaligned speakers—empowering you to enjoy your favorite tunes on every ride. FAQs on Motorcycle Audio System Wiring Guide and Upgrades How do I choose the right stereo system for my motorcycle? Choose a system that’s compatible with your bike model, offers water resistance, and fits securely using included mounting hardware. Look for features like Bluetooth, high wattage output, and quality speakers suited for outdoor environments. Can I install a motorcycle audio system myself? Yes, many riders successfully install systems with the help of a detailed motorcycle audio system wiring guide, careful reading of the manual, and basic wiring tools. Start simple and progress to more complex upgrades as you gain confidence. What’s the best way to keep my motorcycle radio safe from weather? Use waterproof or splash-resistant casing, cover unused ports, and ensure all wiring and connections are protected with heat shrink, electrical tape, or rubberized coatings to prevent water ingress. Are there motorcycle speakers that work best at high speeds? Yes, high-sensitivity and weatherproof motorcycle speakers perform best on the open road, maintaining volume and clarity even with significant wind and engine noise. Look for models specifically engineered for motorcycles. Key Takeaways: What Every Rider Should Remember About Motorcycle Audio System Wiring Use a dedicated wiring diagram for your motorcycle model Prioritize safety and secure installations Upgrade motorcycle speakers for maximum clarity Ready to Transform Your Ride? Call Nasty Performance Motorcycle Shop Today: 847-458-4858 Don’t settle for generic sound—empower every ride with music the way it was meant to be heard. Safe, secure, and expertly upgraded audio is the secret weapon for an unforgettable journey. If you’re passionate about keeping your motorcycle performing at its best, your journey doesn’t end with audio upgrades. Discover how proactive maintenance and seasonal care can further protect your investment and enhance every ride. Dive into seasonal bike care strategies every rider should master for advanced tips on safeguarding your bike’s electronics, optimizing performance, and ensuring your sound system—and every other component—thrives in any weather. Elevate your riding experience by combining expert audio installation with smart, year-round motorcycle care.

Tips for Motorcycle Audio System Troubleshooting to Avoid Common Mistakes

Ever turned up your motorcycle stereo on a long ride, expecting great sound, only to find static, weak volume, or lost bluetooth connectivity instead? If so, you’re not alone. Many riders choose advanced audio setups, but even the best motorcycle stereo systems can suffer from unexpected hiccups—making every mile less enjoyable and more frustrating. In this guide, we’ll break down practical motorcycle audio system troubleshooting tips to avoid rookie mistakes and amplify your music playback on any journey. Unlocking Superior Sound: Why Motorcycle Audio System Troubleshooting Matters Whether you ride through city streets or at highway speeds, your motorcycle's audio experience can make or break the trip. Riders invest in premium stereo systems and amp kits, expecting their music streaming to cut through engine noise and wind noise. But when issues arise—like poor sound quality, bluetooth connectivity dropouts, or static sound—your enjoyment suffers and your investment risks long-term damage. Regular motorcycle audio system troubleshooting ensures that all components, from speaker wires to smart integration features, deliver superior performance, volume, and clarity wherever the road takes you. Ignoring minor issues now—such as weak sound, intermittent signals, or physical wear—too often leads to larger stereo system failures or costly repairs in the future. Motorcycle stereo systems are specifically designed to handle road conditions and extreme heat, but only work at their best if consistently maintained. By learning to diagnose, check, and optimize your sound system, you gain control over your ride, ensuring great sound no matter the environment. This proactive approach isn’t just about entertainment; safe and clear audio can be crucial for receiving navigation cues and staying focused, especially at highway speed. What You'll Learn About Motorcycle Audio System Troubleshooting Understand common audio system mistakes riders make Master motorcycle audio system troubleshooting steps Enhance your motorcycle stereo and sound quality Boost your overall audio experience on the road Essential Motorcycle Audio System Troubleshooting Steps Before you consider upgrades or professional repairs, start by understanding the vital steps in motorcycle audio system troubleshooting. A methodical approach quickly uncovers whether your issues stem from wiring, speaker installation, or smart features like Bluetooth connectivity. Riders often make the mistake of jumping straight to complex fixes or blaming the factory system, but a structured process ensures you don’t overlook simple, preventable factors. Here, we outline how to assess both physical and electronic elements, spot red flags, and lay the groundwork for flawless audio experience every ride. Start with a visual and audible check—listen for static or weak sound, inspect for frayed wires or loose amp kits, and confirm all switches and settings. Don’t ignore minor changes in music playback or volume and clarity; these small shifts often hint at deeper issues in a stereo system designed to handle tough road conditions and highway speeds. With the right basic tools and a strategic plan, many common problems can be addressed before they escalate, preserving your investment and enjoyment for years to come. As you work through these troubleshooting steps, remember that maintaining your motorcycle’s audio system is just one part of keeping your ride in top shape. For a comprehensive approach to seasonal maintenance and to avoid issues that can impact your entire bike, check out these essential seasonal bike care secrets every rider should know. Identifying Issues with Your Motorcycle Stereo System Signs of poor sound quality Common motorcycle audio system troubleshooting indicators Physical and electronic checks Common warning signs that your motorcycle stereo system needs attention include a sudden drop in volume, static or hissing noises even at rest, or complete cutouts when you hit certain speeds or road conditions. If you notice distortion competing with wind noise or engine noise while riding, it’s an immediate signal that something’s off. Intermittent loss of music streaming or crackling sounds during Bluetooth connectivity usage can indicate failing speaker wires or ground connection issues—especially in older or factory systems not designed for today’s high-output audio demands. Begin your motorcycle audio system troubleshooting by visually assessing all amplifiers, amp kits, and connections for corrosion or wear. Use your senses: listen for inconsistencies and feel for loose plugs or heated components. Don’t forget electronic checks: a multimeter can reveal undervoltage, inadequate ground connection, or bad fuses that degrade sound quality. Systems designed specifically for motorcycle use rely on robust installation—so frequent, hands-on inspections are key to preventing failures and keeping your stereo system performing at its best. Basic Tools and Preparation for Audio System Troubleshooting Essential troubleshooting equipment Preparation checklist for safe inspection Starting your troubleshooting journey begins by assembling a toolkit tailored to motorcycle audio systems. You’ll need a reliable multimeter for diagnosing electrical issues, insulated screwdrivers, cable testers, extra fuses, and a headlamp for tight spaces. A simple set of zip ties lets you secure loose speaker wires or amp kit elements, preventing minor issues from escalating into major faults at highway speeds. Don’t forget a clean microfiber cloth and electronic-safe contact cleaner—dirt or moisture buildup can sharply diminish sound quality and cause music dropout or interruption. Preparation also means safety: disconnect the battery before opening any panels on the stereo system, use gloves for insulation, and follow your manufacturer’s instructions. Never rush this process; methodical, careful checks will reveal hidden issues—like hairline cable fractures or worn connectors—especially in factory systems not equipped for modern, higher-power amp kits. Making a habit of routine, well-equipped inspections boosts your audio experience, extends your stereo system’s life, and ensures you can hear your music even through engine noise and wind noise on the open road. Improving Sound Quality: Targeting the Most Frequent Issues Even the most robust motorcycle stereo systems can fall victim to diminishing sound quality over time. Recognizing and proactively addressing these frequent issues—like poor speaker placement, wiring faults, or Bluetooth signal problems—ensures your audio experience keeps pace with your on-road adventures. The right fixes can transform a weak or static-ridden stereo system into a setup built for great sound and reliability at any speed. Below, we break down adjustments and repairs that pay big dividends in clarity, volume, and wireless performance for riders who demand the best. Common mistakes include overlooking speaker direction, failing to check for secure ground connection, or ignoring regular Bluetooth connectivity resets. Every detail—amp kit calibration, tight speaker wires, system cleaning—contributes to a rich, immersive music playback every time you hit the highway. By learning these solutions, you’ll have both factory system basics and smart integration upgrades performing at their highest level, delivering true ride-enhancing audio. Optimizing Speaker Placement and Output Motorcycle stereo speaker adjustment techniques Checking for wiring and connection faults Speaker placement and proper output adjustment play a huge role in your motorcycle audio system’s overall performance. Ideally, speakers should be mounted to minimize wind noise interference and positioned to direct sound toward the rider’s ears, not just out into open air. If music playback suddenly turns weak or muffled during long rides or at highway speeds, don’t dismiss speaker location or vibration as potential culprits. Use manufacturer-recommended brackets and spacers—systems specifically for motorcycle use will often include these options to combat engine noise and the intense environment of the road. Equally important is a rigorous check of all wiring: loose, corroded, or improperly shielded speaker wires can lead to intermittent connections, resulting in static, distortion, or total audio loss. Carefully inspect and tighten every terminal, test ground connection integrity, and avoid running speaker or amp kit cables near high-interference electronics. Address every weakness and you’ll enjoy a stereo system that delivers great sound—no matter the road, speed, or weather. Diagnosing Bluetooth Connectivity and Signal Problems Bluetooth connectivity loss or interruption Fixes for wireless pairing issues in motorcycle stereo systems One of the most common frustrations for riders is sporadic Bluetooth connectivity or ongoing pairing issues between a phone and a motorcycle stereo system. Wireless music streaming offers freedom and convenience, but the same factors that add joy—like smart integration and music playback at highway speeds—can also invite confusion and dropouts. If you’ve experienced sudden disconnections, lag during music playback, or trouble keeping your devices paired, start troubleshooting by eliminating local sources of wireless interference: avoid pairing multiple devices at once, disable unused connections, and keep your phone’s firmware up-to-date for best broadcast strength. If problems persist, reset both the stereo system and your Bluetooth device, then re-pair from scratch. Some factory systems and aftermarket amp kits offer manual pairing mode, which can bypass stubborn connection lags. Double-check that stereo and device settings match, and keep physical connections clean. With Bluetooth connectivity delivering so much of today’s audio experience, these simple checks ensure your riding soundtrack remains seamless—no matter where or how far you go. Common Motorcycle Audio Problems and Troubleshooting Steps Common Motorcycle Audio Problems Probable Causes Troubleshooting Steps Static sound Loose wiring Inspect and resecure wires Low volume Faulty speakers Test or replace speakers Bluetooth dropouts Interference Re-pair device, check environment Avoiding Common Motorcycle Audio System Mistakes Neglecting routine system checks Ignoring minor sound quality deterioration Overloading stereo system beyond capacity Incorrect Bluetooth connectivity setups causing audio lag Many riders stumble over avoidable pitfalls while striving for a superior motorcycle audio experience. The most widespread error? Skipping regular checks of the stereo system’s health—out of sight, out of mind. Ignoring small dips in sound quality often results in permanent speaker damage or deeper electronic faults. Another frequent mistake is pushing the factory system or aftermarket amp kits beyond their recommended power range. Overloaded components wear rapidly, shortening the system’s lifespan and raising the risk of abrupt failure midway through a long ride. Yet another common problem sits with modern smart features: improper Bluetooth connectivity setups resulting in audio lag, dropped connections, or music streaming delays. Spending a few minutes following best practices for wireless pairing—never connecting when moving, keeping firmware updated, and systematically pairing devices—eliminates these headaches. Ultimately, cautious, routine attention to your motorcycle stereo system protects sound quality, lets you hear your music clearly at highway speeds, and ensures your rides stay as smooth as your favorite playlist. "Consistent motorcycle audio system troubleshooting doesn't just save you money—it transforms every ride into a superior audio experience. " People Also Ask: Common Motorcycle Audio System Questions What two reasons usually cause speaker failure? Speaker failure in motorcycle stereo systems is most often caused by two main issues: physical damage and prolonged electrical stress. Physical damage can happen when water intrusion, vibration from rough road conditions, or debris gets into the speaker housing, leading to tears or warping of the cone. Prolonged electrical stress arises when the stereo system is operated beyond its power handling capacity—either from using incompatible amp kits or driving speakers at maximum volume for extended periods. Both scenarios result in weak sound, distortion, or complete audio loss, underlining why routine checks and proper setup are crucial for lasting great sound. How to reset Harley Davidson radio? Resetting a Harley Davidson radio typically involves turning the ignition switch to accessory mode and then holding down the preset buttons number one and number four simultaneously for several seconds. The display should flash or show a reset message, signaling that the stereo system has returned to its factory settings. Remember to reconfigure Bluetooth connectivity and personal audio preferences after the reset for optimal music playback and sound quality. Always refer to your motorcycle’s user manual, as reset steps might vary by model or year. How to troubleshoot audio systems? Begin motorcycle audio system troubleshooting by visually inspecting all components—check the speaker wires, ground connection, and amplifier terminals for signs of corrosion, loosening, or physical wear. Listen for changes in sound quality, distortion, or static, and use a multimeter to test electronic connections and ensure proper voltage flow. If you find that Bluetooth connectivity or music playback is inconsistent, reset and re-pair all wireless devices. Where problems persist, test each component (like swapping speakers) in isolation to pinpoint the exact source. Consistent, step-by-step checks are key for both quick fixes and long-term audio system reliability. What are the common speaker problems? The most common speaker issues in motorcycle stereo systems include static, distortion, low volume, complete audio loss, and intermittent output. These typically stem from loose connections, damaged speaker wires, water intrusion, or running the speakers at volumes that exceed their design limits. Vibration and wind noise at highway speed add extra strain, making secure installation critical. If a problem emerges, immediate troubleshooting prevents more severe and expensive damage to your motorcycle stereo system and helps keep your audio experience crisp and reliable. Expert Motorcycle Audio System Troubleshooting FAQs What signs indicate poor sound quality in a motorcycle stereo? Look for sudden drops in volume, increased static or distortion, and music that sounds muted or off-balance. These symptoms usually mean it's time for troubleshooting your motorcycle audio system. How can I enhance Bluetooth connectivity on my motorcycle stereo system? Ensure that your devices' firmware is current, keep unused connections turned off, and pair devices in a stationary environment to reduce interference for reliable music playback. Are there specific tools for motorcycle audio system troubleshooting? Yes, essential tools include a quality multimeter, cable testers, insulated screwdrivers, replacement fuses, and contact cleaner. Keeping these at hand allows for quick diagnosis and routine maintenance. Professional mechanic troubleshooting a motorcycle audio system: cable checks and speaker testing in a modern shop. Key Takeaways for Motorcycle Audio System Troubleshooting Regular motorcycle audio system troubleshooting prevents long-term damage Optimizing your stereo system elevates your audio experience Attention to sound quality and connectivity issues ensures safety and enjoyment Ready to Upgrade Your Ride? Contact Nasty Performance Motorcycle Shop at 847-458-4858 Call Nasty Performance Motorcycle Shop Today: 847-458-4858 to schedule a professional audio system inspection or upgrade. Take the next step toward flawless sound quality and music enjoyment on every ride! Conclusion: Consistent motorcycle audio system troubleshooting protects your investment, guarantees fantastic sound quality, and ensures your rides are always as thrilling as the open road ahead. While mastering audio troubleshooting is key to a better ride, true motorcycle care goes beyond just your stereo system. If you’re ready to elevate your entire riding experience, consider exploring expert advice on seasonal maintenance and holistic bike care. Discover how proactive upkeep can prevent issues before they start, keep your machine running smoothly, and ensure every journey is as enjoyable as your favorite playlist. For a deeper dive into comprehensive motorcycle maintenance strategies, don’t miss the insights in Seasonal Bike Care Secrets Every Rider Must Know—your next level of riding confidence starts with the right knowledge.

Tips for Motorcycle Radio and Speaker Combos Explained by the Experts

Did you know that over 60% of motorcycle riders report increased enjoyment and awareness on the road thanks to advances in motorcycle audio systems? Yet, the majority still miss out on premium features that transform every ride. If you want to experience crisp, powerful sound on your touring motorcycle or simply crank up your favorite tunes while cruising, the right motorcycle radio and speaker combos can make all the difference. In this guide, we’ll unlock expert insights, practical tips, and must-have features to help you choose the ideal motorcycle speakers and audio system for any journey. What You’ll Learn About Motorcycle Radio and Speaker Combos Essential features of motorcycle radio and speaker combos How to select motorcycle speakers and motorcycle audio systems for different bike types Expert recommendations on motorcycle audio and audio kit upgrades Benefits of advanced smartphone integration and wireless connectivity Key installation tips for a complete motorcycle audio system Why Motorcycle Radio and Speaker Combos Matter: Uncovering the Essentials “Most motorcycle riders dramatically improve their on-road experience with the right audio system, yet many settle for default options that fail to deliver.” – Specialist at Nasty Performance Motorcycle Shop When it comes to elevating your time on the open road, motorcycle radio and speaker combos are no longer just an optional upgrade—they’re an essential part of an immersive journey. Whether you’re riding a high-powered touring motorcycle or a streamlined cruiser, the right audio kit impacts everything from your enjoyment of music to the clarity of vital navigation cues. Most stock bike audio systems fail to deliver top-tier audio performance and can struggle with road noise or weather, making aftermarket motorcycle audio systems an important investment for any motorcyclist seeking quality sound and enhanced safety. With modern technology, you’re not just choosing better volume—you’re choosing cutting-edge solutions built to withstand the elements and designed to seamlessly integrate into the ride. Understanding the true potential of audio kits and premium speaker systems will not only enhance your favorite playlists, but can also improve rider alertness—delivering clear, distortion-free sound at any speed. Let’s explore how top manufacturers are transforming audio kits from basic setups into full-featured multimedia systems, offering additional functionality such as wireless smartphone integration, rugged waterproof construction, and bespoke system compatibility for all types of touring motorcycles and bikes. The Role of Motorcycle Audio: More Than Just Volume Audio system enhancements for touring motorcycles Impact of superior motorcycle speakers on the ride Innovations in motorcycle audio: From basic to premium audio kits Today’s motorcycle audio systems deliver far more than just volume; they provide real, tangible improvements in the enjoyment and safety of your trip. Upgrading your bike’s setup with an advanced audio kit can transform dull or muffled factory sound into a rich and immersive experience tailored specifically for the unique acoustics of motorcycles. Audio kits are designed for both novice and expert riders, factoring in features like max power, RMS power, and speaker placement—for example, pairing a robust rear speaker with a quality fairing speaker optimizes sound on even the largest touring motorcycles. For riders interested in maximizing their audio system’s performance, it’s also helpful to understand how seasonal maintenance can impact your equipment’s longevity and sound quality. You can find practical advice on this topic in the guide to seasonal bike care secrets every rider must know, which covers essential upkeep tips for both your motorcycle and its audio components. Premium systems incorporate durable weatherproof materials capable of withstanding rain and road debris, while specialized amp and speaker upgrades reach power and fidelity levels unheard of in stock units. Premium coaxial and horn tweeter options let riders hone in on maximum audio performance for sprawling road trips or urban commutes. These innovations redefine what music and navigation should sound like on two wheels, enhancing road awareness, passenger communication, and overall ride satisfaction on touring bikes and beyond. Modern Technology in Motorcycle Radio and Speaker Combos Integration with smartphones and wireless smartphone solutions Fairing speaker and saddlebag speaker placement How head unit advancements drive audio kit evolution The modern era has ushered in a revolution in motorcycle radio and speaker combos, bringing technologies once reserved for luxury vehicles directly onto your handlebars. The standout feature for many motorcycle enthusiasts is seamless smartphone integration. This allows for wireless smartphone connection, letting you control playlists, navigation, and calls without taking hands off the grips or eyes off the road. Top head unit upgrades now support Bluetooth, Apple CarPlay, or Android Auto, enhancing your ability to enjoy music, podcasts, and communications on every ride. Wireless smartphone integration eliminates cable clutter and boosts convenience, especially on longer journeys. Another major advancement is the customizable placement of audio components: fairing speakers provide a balanced sound stage in front, while rear speaker and saddlebag speaker additions widen the audio field for both rider and passenger. With so many specialized options for touring motorcycles, the latest audio kits are designed for modular upgrades—start with a powerful head unit and expand into multi-zone audio for complete control. The result is a fully connected ride, tailored for comfort, enjoyment, and situational awareness at every turn. Expert Tips for Choosing Motorcycle Radio and Speaker Combos With countless options for motorcycle audio system upgrades available, how do you pick the right setup for your bike and riding style? Our experts break down the decision process into manageable steps, focusing on core requirements—compatibility, durability, integration, and sound quality. Whether you ride a modern touring motorcycle or a minimalist cruiser, there’s a perfect audio kit or system waiting for you, provided you know what features and specs to look for. Prioritizing these factors ensures your next motorcycle radio and speaker combo delivers maximum enjoyment and reliability, both around town and on cross-country trips. Assess your personal needs first: Are you looking for total wireless smartphone integration, do you need advanced waterproofing, or do you want a system flexible enough to expand over time? Consider consulting with a professional installer for complex upgrades, especially when integrating multiple speaker zones or retrofitting classic bikes. Read on to learn about speaker types, integration strategies, and comparison points that every smart buyer should know. Understanding Motorcycle Speaker Types and Features Premium coaxial vs. horn tweeter speakers Rear speaker and audio kit compatibility for touring motorcycles Audio kits for specific motorcycle radio and speaker combos Choosing the right motorcycle speaker begins with understanding the difference between premium coaxial and horn tweeter types. Premium coaxial speakers combine multiple sound frequencies in a single, compact unit—delivering balanced mid-bass and treble perfect for most open-road scenarios. Horn tweeters, on the other hand, are engineered for high-power efficiency and directional clarity—a favorite for riders craving crisp, high-frequency sound that cuts through engine noise and wind at highway speeds. If you’re upgrading a touring motorcycle or outfitting a new ride, pairing a quality rear speaker and fairing speaker can create a surround-sound effect that envelopes both rider and passenger. Most advanced audio kits are designed for hassle-free compatibility, providing brackets and wiring for every major bike model. Some systems offer modular expansion, letting you start with essential audio kit pieces—like a main head unit—before adding horn tweeters, rear speakers, or even saddlebag speakers as your needs evolve. By prioritizing the right features and fitment, you ensure optimal audio performance, fewer installation headaches, and a lifetime of powerful sound. Comparing Motorcycle Audio System Integration Options Wireless smartphone integration—do’s and don’ts Assessing head unit and fairing speaker upgrades Choosing audio systems based on your touring motorcycle’s needs Integration is key to creating a motorcycle audio setup you’ll love. Top audio system manufacturers now prioritize wireless smartphone integration, offering streamlined pairing via Bluetooth, easy-to-use controls, and voice command features. Always check for firmware compatibility and ease of use—some head units offer one-touch smartphone integration, while others require a more manual process. Avoid systems that lock you into proprietary apps or force you to use wired connections unless you have a specific reason for doing so. When evaluating upgrade paths, focus on the head unit: modern models stand out by offering higher max power handling, increased RMS power, and multiple input options. Pairing these with high-sensitivity fairing speaker or saddlebag speaker upgrades helps deliver distortion-free output, even at high speeds. Ultimately, each audio system should match your bike’s electrical system and the unique demands of your touring motorcycle or cruiser — ensuring reliable, high-quality sound wherever you ride. Comparison Table: Key Features of Top Motorcycle Radio and Speaker Combos Combo Speaker Type Head Unit Smartphone Integration Weather Resistance Audio Zones Ideal For Premium Coaxial System Coaxial Touchscreen/Bluetooth Full Bluetooth, Apple/Android Compatible IP67 Waterproof Front, Rear, Saddlebag Touring Bikes Horn Tweeter Kit Horn Tweeter Digital w/Voice Control Wireless Smartphone Weatherproof Front/Rear Cruisers & Urban Riders Advanced Touring Audio Kit Coaxial + Tweeter + Sub Multimedia Touch/CarPlay WiFi, Bluetooth, USB Water & Dust-Resistant All Zones Premium Touring Motorcycles People Also Ask: FAQs on Motorcycle Radio and Speaker Combos What are the best motorcycle radio and speaker combos for long-distance touring? The best motorcycle radio and speaker combos for long-distance touring bikes are those designed specifically for high-output, weather-resistant audio performance. Look for combos that integrate premium coaxial or horn tweeter speakers, modular audio kits for multi-zone sound, and modern head unit features like wireless smartphone integration and waterproof construction. These systems withstand the elements and high speeds, providing clear audio throughout extended road trips. How do motorcycle speakers differ from standard vehicle speakers? Motorcycle speakers are engineered to handle environmental challenges like rain, dust, and wind noise—unlike standard vehicle speakers. They often use durable, IP-rated materials and are tuned for open-air sound delivery, with higher max power and sensitivity to overcome engine and road noise. Additionally, many audio kits are designed for seamless installation in tight spaces such as fairings or saddlebags, boosting both practicality and sound coverage on touring motorcycles and cruisers. Can I upgrade my motorcycle audio system without professional help? While many modern motorcycle audio kits are built for do-it-yourself installation, some components (especially new head units or complex multi-speaker setups) may require intermediate to advanced skills. If you’re comfortable with basic wiring and mounting, you can often upgrade fairing speakers or install plug-and-play kits yourself. However, for major integrations—like full audio systems with rear speaker arrays or custom saddlebag speaker solutions—consulting a specialist ensures optimal performance, safety, and compatibility with your bike’s electrical system. Are there waterproof motorcycle audio kits to consider? Absolutely. Top-ranked motorcycle audio kits and speaker combos feature waterproof or weather-resistant construction, using seals and durable membranes to protect against rain, washdown, and harsh road conditions. Prioritize these options, especially for touring motorcycles or riders who regularly tackle diverse weather. Waterproofing extends both the life and performance of your audio system, letting you ride and enjoy music worry-free in any environment. Expert answers to common questions about motorcycle audio system installation, quality, and compatibility Clarifying differences between audio kit options for touring motorcycles and standard models Practical tips for maximizing durability and connectivity Key Takeaways for Selecting the Right Motorcycle Radio and Speaker Combos Prioritize compatibility between your motorcycle radio and speaker combos and bike model Leverage advanced features—look for smartphone integration and robust head unit options Use professional advice to navigate premium coaxial, rear speaker, or saddlebag speaker selections Protect your investment with waterproof or weather-resistant audio systems Reach the Ultimate Ride: Get Expert Help with Motorcycle Radio and Speaker Combos “Don’t settle for average sound—discover custom solutions perfectly suited for your adventure.” Call Nasty Performance Motorcycle Shop Today: 847-458-4858 Watch: In summary: The right motorcycle radio and speaker combos blend compatibility, durability, and modern integration, creating a sound experience as thrilling as the ride itself. Ready to upgrade? Call Nasty Performance Motorcycle Shop Today: 847-458-4858 for expert advice and installation tailored to your journey! For riders who want to go beyond audio upgrades and truly master every aspect of motorcycle ownership, exploring comprehensive care strategies is the next step. Discover how to protect your investment year-round and keep your bike performing at its best by diving into seasonal bike care secrets every rider must know. This resource offers advanced tips and actionable insights that complement your audio enhancements, ensuring every ride is smooth, safe, and unforgettable.

Terms of Service

Privacy Policy

Core Modal Title

Sorry, no results found

You Might Find These Articles Interesting

T
Please Check Your Email
We Will Be Following Up Shortly
*
*
*